Nature Quilt Finished!
I wonder how many of my posts follow this formula: “Plan A + Materials B = Progress to Point C. Suddenly, Difficulty D comes along and causes everything to go horribly awry, at which point Options E, F, G, and H are tried, and inevitably, Result Z is settled for.”
Well, this post fits the pattern.
When I left off almost a month ago, I had received fabrics I designed and ordered from Spoonflower. I was very happy with the look of Materials B, even though the colors of the water and the foliage were a little dark. I wasn’t worried about that, because I had Plan A — all sorts of intense quilting with light colors of thread, and I wanted those dark colors to provide the shade. I washed the fabrics and no dye at all bled off them, and I dried them and ironed them and they held up great.
Directly after Point C, the basting, Difficulty D came along.
(And none of this is Spoonflower’s fault, this is all me, because I didn’t have time to order fabric samples, and just went ahead and guessed which fabric would be best…)
I had ordered the prints to be made in Kona cotton, and with using it both front and back, with a wool batting, I think that combination was just too thick for my machine. I couldn’t get the top thread and bobbin thread to interlink. I heard little popping sounds as the needle went through the layers, and I would look down and see the holes were spaced nicely, but the two threads were only connecting every fourth or fifth stitch. Also, even when the stitches were spaced right, the stitch holes on the back were just gigantic. It looked like those punch cards we learned to sew on when we were four.

Big circular spaces around each stitch.
So here is where Options E through X were tried. I sampled every needle and thread combination known to Sewingkind — quilting, topstitch, jeans, microtex, universal; cotton, polyester, silk. I cleaned out lint, changed thread tensions and presser foot pressures, feed dogs down, feed dogs up.
I have used wool batting before and had results I liked, so I was puzzled as to why I was having difficulties, but it occurred to me that maybe in the past I had split the batting in two and just used a thin layer.
In case you have gotten to this post because you too, did not have time to order samples and practice on them, and you have found yourself in the same situation and need some sort of solution — what finally kind of worked, was using my walking foot for the free motion quilting, with the presser foot pressure set between 0 and 1. I think it was heavy enough to compress the layers, so that the needle could come back up through the cloth before the wool puffed out. It would also be interesting to try a thinner fabric for backing.
I quickly settled for Result Z, which was to quilt very minimally. The quilt will hold together without the batting shifting, but without the embellishment of the light threads I had planned, now I think the dark colors are really too flat and dark. I wish I had remembered that an image on a backlit computer screen, is going to look a lot more illuminated than a flat printed image, and adjusted the colors accordingly. If this was going to be a wall piece, I would add hand-stitching or maybe some areas of textile paint to add highlights, but as it is going to be used by a little boy, we will just leave it this way, and be thankful we don’t have to worry about it. (I am going to add a few highlights to the eyes, though.)
I had the central panel quilted in time for the first baby shower. But as I wrapped it up, I saw that the bottom third was terribly puckered. With all those needle-popping noises and resistant spots, I hadn’t noticed any extra-troublesome spots as I was quilting.
When my daughter opened it, she loved it, and was explaining to the guests how the animals were from our own pictures. There were some other quilters there, and I explained to them, “There are puckers on the back though.” Some of the non-quilters asked, “What’s a pucker? I know what a bobcat is, and a coyote…” They thought there was some wild animal that had a name they hadn’t heard.
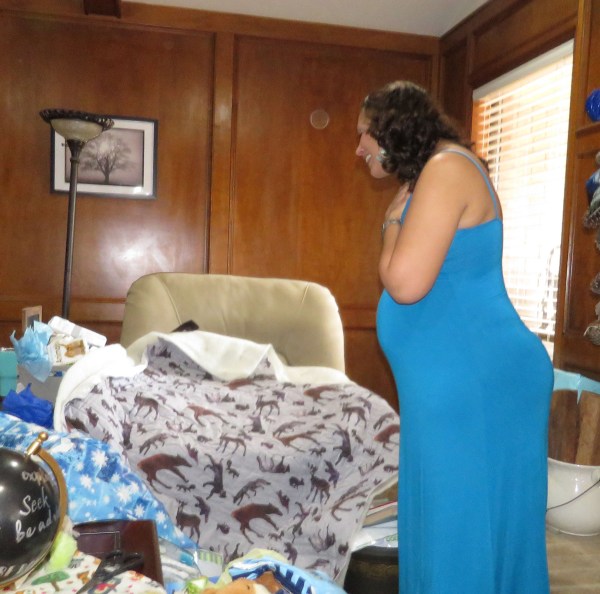
Looking at the animals on the back.

Holding up the partly-finished quilt.
After most of the guests had gone home, I pulled out a big stack of choices for finishing the quilt, and my daughter and her friend decided on options. (“Too yellow… no, that turquoise isn’t in here anywhere else… too dotty…” We were all in consensus, which was reassuring.) The one decision that she made was that she wanted a striped binding, which is what I wanted to do!
I knew I needed to rip stitches and then re-quilt, and with all the difficulties I had had, I kept putting it off. It was hanging over my head, and I wouldn’t let myself go on to any other projects. But finally this week I finished it!
I ended up leaving out the two green fabrics, which was disappointing, because I really wanted to create the world’s only baby quilt with a Crested Caracara in it. We all thought they fought with the central picture, so I just used more of the gray backing fabric to finish the front.

The medium-scale fabric with a mottled background, the small-scale fabric with a plain background.
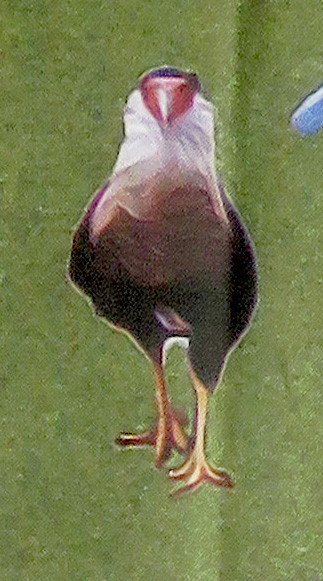
Crested Caracara will have to wait for another project.

The front.

The back.

Borders on the sides, and a view of the minimal quilting.
As I took it out to photograph this morning, I saw how well it fits in with our surroundings. The color palette doesn’t fall far from the farm!

Rusty-roofed old barn.

Trailers make great quilt racks.

Real Life with Quilt.
I am so glad it is done, and I can stop worrying about it. And I can go order some fabric samples from Spoonflower for the next time!


Congrats on finishing the quilt! How wonderful to use photos you took and I have been thinking of Spoonflower myself for a project, it is great to see how it can be used! Wonderful gift 🙂
Thank you! It was fun to be able to create a personalized gift and I think I will do it again in the future.
It’s perfect! I can’t believe you did all those narrow borders. Fantastic! After all the problems you had to finally get to where you needed to be with foot pressure, etc. I would have just whipped something around it to end it all. But of course, being you, you perservered and came up with that stunnng creation.
Well, the straight stitching went much better than the free motion. But thank you!
I’m just really impressed you finished it! What a lot of headaches–but the end product made it all worthwhile, plus the smile on your daughter’s face!
Right at the end, I suddenly started thinking, “I have gone off in left field here,” but I told her she could have a do-over if she wanted it. But she liked it so that was a relief! 🙂
Fabulous undertaking and completion. Quilted art to be cherished.
Thank you!
Best laid schemes “aft gang agley… ” Yes, Kona seems thicker than other cottons. It’s why I don’t use it for bindings. I’ve FMQed with wool batting and didn’t have that holey problem, but from the pix your batting was really thick. Once I inadvertently put in a double layer of wool batting and had the puffiest baby quilt ever. And some people FMQ with a walking foot all the time. But…what counts is the result and from the look on your daughter’s face, every headache was worth it. Maybe you could do the crested caracara as a throw pillow.
I really depended on the reviews and information you had posted about Spoonflower and the other print-on-demand companies, so thank you again for those posts! You saved me a lot of time and worry!
That quilt is just THE BEST! Love the Animals and yes, Kona is stiffer, must be the dyes. Those animals are making me smile 🙂
I was so afraid of getting thin fabric, I thought I better go up a dollar a yard to get better quality — it never occurred to me I might get fabric that was TOO sturdy! 🙂 Next time, next time.
Glad you like it!
I think Spoonflower offers Pimatex and that is a nice weight and smooth so the image is clear. I used Kona back when it was the only full range of solid colors available, but rarely use it now because of the relatively coarse weave.
Oh Gwen, this turned out beautifully! I’m sorry you had so many headaches with it. But you know, me, I’m also thinking, “think of how much you LEARNED!!! 🙂 Of course she loves it, and I’m sure it will be treasured. Congratulations on the expected grandbaby.
Thank you, and you are right, I learned a lot! Now the question is, will I remember it by the next time a similar quilting situation arises? I am great at keeping project notes, but not so great at re-visiting those notes at the beginning of a project when they might do me some good.
I was really glad that I could create something unique for the new parents — this daughter hasn’t lived with us for 13 years and I had a sudden thought that maybe her tastes had changed, but no, it all worked out fine. 🙂
Yay! I’m so glad it’s done! And just in time. Only a few weeks left before your grandson will be here to use it!
We may want to wait until he goes to college. It’s pretty heavy. 🙂
I have included your blog in INTERESTING BLOGS in FRIDAY FOSSICKING at
https://thatmomentintime-crissouli.blogspot.com/2018/04/friday-fossicking-13th-april-2018.html
Thank you, Chris
Pingback: Wrapping up 2018 | Deep in the Heart of Textiles
Pingback: Two Finishes and a Disappointment | Deep in the Heart of Textiles
Pingback: Notes on Design Styles | Deep in the Heart of Textiles