Natural Dyes
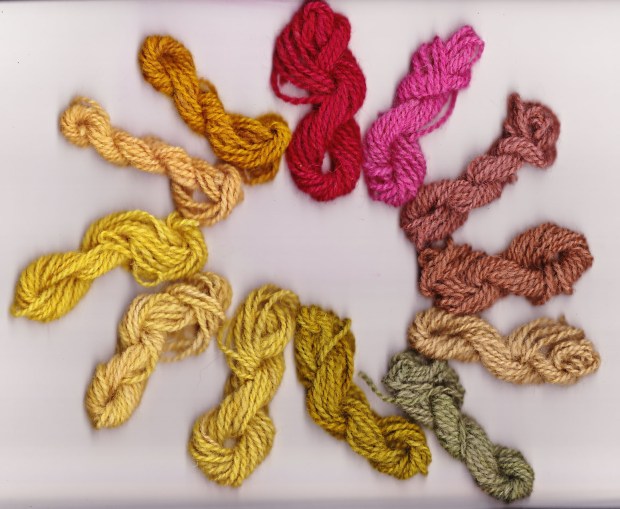
Summer Color Wheel 2013
(Safety note: I do not have kids at home. If I did, I would think long and hard about if they were old enough and wise enough to be trusted around these materials. )
Materials
Yarn – Initially I got Crown Colony 2-ply wool yarn from Dharma Trading. I wound the big skein, which was 8 ounces, into 25 sample skeins of about 10 grams each. (This was the least expensive wool they had, and it is meant for rug yarn, so it is a little rough. Once I knew this procedure worked so well, I upgraded to the Licorice Twist yarn.)
Whatever you get, make sure it is “Prepared for Dyeing” yarn so it will not have finishes that interfere with dye take-up.
Before dyeing, soak the skeins in distilled water overnight.
Basic equipment -Plants can be toxic! I keep all equipment clearly marked and separate from food use.
- a big enamel pot
- some small glass or enamel bowls
- measuring cups
- gallon-size glass canning jars
- an electric hot plate (so I can dye outside and not in the kitchen).
Also nice – a basic digital scale and a big candy thermometer, to keep records in case you want to repeat a certain result.
Mordanting
To get natural dyes to produce intense color that doesn’t fade, you need to mordant your yarn. The dye book I rely on is Jenny Dean’s Wild Color. She has done all the research and testing and formula creation. After trying many of her methods, I have found that the mordant that works best for my dye trials is alum, and this is how I have simplified the recipe for my habits.
Put 2 gallons of cool water into the big enamel pot.
Boil about 5 cups of water separately.
In one measuring cup, mix 2 ounces of cream of tartar with 2 cups boiling water, until dissolved. (I used Adams brand, just from the grocery store.)
When well-mixed, add 7 tablespoons (or a half cup, less one tablespoon) of this mixture to the cool water in the big pot.
In another measuring cup, mix 2 ounces alum with 2 cups boiling water. (I used McCormick regular household alum from the grocery store. The jar I bought had 1.9 ounces so I just used the whole thing.) When dissolved, add one-half cup of this mixture to the cool water in the big pot. Stir everything well.
(Dreaded MATH – My numbers don’t come out exactly perfect. Jenny Dean recommends that you use alum to equal 8% of the weight of the material you are dyeing. So 2 ounces of alum (mixed into solution) would be enough for 25 ounces of material. The wool comes in 8 ounce skeins. So the two cups of alum solution and two cups of cream of tartar solution would be enough to mordant three of those big skeins. I do 8 ounces of wool in the first pot, then add a half cup of each solution to the same water, then add 8 ounces more wool, etc. So I would get 32 ounces of wool mordanted from those alum and cream of tartar solutions, and that works fine for me.
If you want to use up all that solution at once, you could have more than one pot going, or use a bigger pot. Or you can keep the solution in a covered jar and use it in a day or two.)
Back to Dye Prep
Remove the skeins from the water they have been soaking in, squeeze out excess water, and place into the big pot that now has dissolved alum and cream of tartar in it. Bring pot to a simmer, simmer 1 hour. Turn off the heat and let the yarn cool in the solution overnight.
Next day, remove the skeins. You can now proceed to dyeing, or let the skeins dry, and dye whenever you have time, plants, and inclination.
Pre-planning for After-bath Modifiers
An easy way to get more color variations is to dip your samples in an after-bath. But for ease of processing your dye lots, you probably want to set up the modifiers a few days before dyeing.
Two easy modifiers are copper liquor and iron liquor. You just put scraps of each metal in a glass jar, and then cover them with a mixture of water and vinegar — equal parts water and vinegar for the copper; two parts water to one part vinegar for the iron.
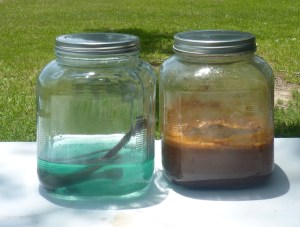
Copper scraps in vinegar and water on the left, iron scraps in vinegar and water on the right.
Another easy modifier is to add about a tablespoon of clear ammonia to the dye bath.
(And now see the safety note at the top about kids.)
Dyeing
Most of the time I just pick something out of the yard, drop it into a pot or glass jar, pour boiling water over it, and see what happens. If some color shows up, I drop in a skein or two and see what happens. This chart shows some of my favorite results from Summer 2013. (Some of them got a modifying dip afterward; that information is after the chart.)
I use basically two methods.
- “Hot pot” method. I place the dye material in an enamel pot, cover with water, and use a hot plate to heat the dye material and water to boiling. Turn it down and let it simmer two hours. Add the yarn, simmer another hour or two, turn off the heat, and let the yarn cool in the dye for the amount of time specified in the chart below.
- “Solar jar” method. I loosely fill a glass cooking pot or canning jar with plant material, pour boiling water over to cover, add the yarn, and let the whole thing stay outside in the sun for the amount of time specified in the chart below.
With either method, I don’t rinse right away. The yarn can rest for days before rinsing.
| #1
dog fennel mordanted with alum, processed in solar jar for 48 hrs. |
 |
 |
|
| #2
dog fennel Eupatorium capillifolium Same as #1, with copper dip afterward |
|
 |
|
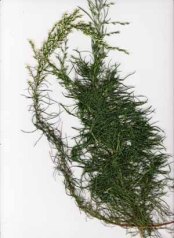
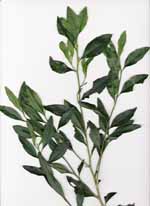
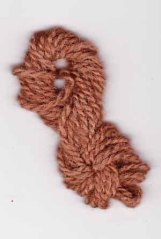
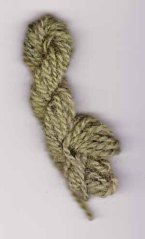
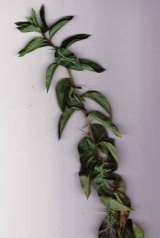
| #3
Eastern baccharis |
 |
 |
|
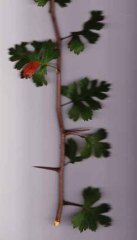
| #4
parsley hawthorn Alum mordant, processed in solar jar 24 hours |
 |
 |
|
| #5
pear No mordant. Processed in hot pot for 5 days. |
 |
 |
|
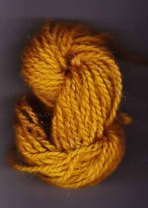
| #6
persimmon Alum mordant, processed in solar jar 8 hours, 1 Tbsp. ammonia added afterward. |
 |
 |
|
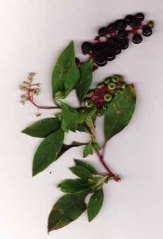
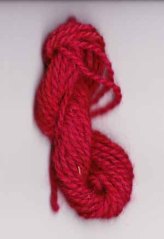
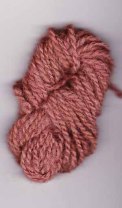
| #7
pokeberry Vinegar mordant, heated to 160 – 180 degrees F for 2 hrs, let cool in dye overnight. |
 |
 |
|
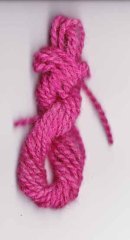
| #8
pokeberry |
|
 |
|
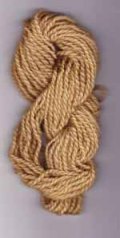
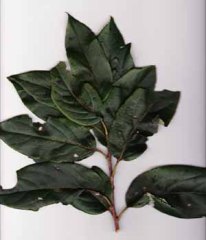
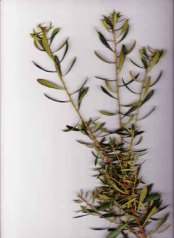
| #9
Southern bayberry Alum mordant, processed in solar jar, 24 hours. |
 |
 |
|
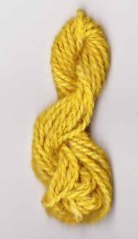
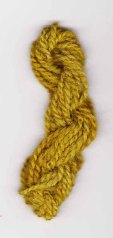
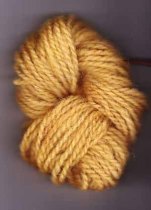
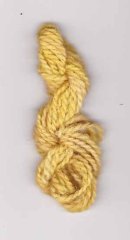
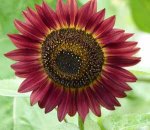
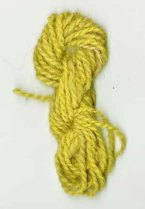
| #10
sunflower Alum mordant, processed in solar jar, 24 hours. |
 |
 |
|
| #11
waterleaf Alum mordant, processed in solar jar, 48 hours. |
 |
 |
|
| #12
winged elm No mordant, processed in hot pot 5 days. |
 |
 |
|
Really the whole process is a lot easier than it sounds in these directions.
If you would like more details on any of the dye samples in the chart, you can look at my posts with the “Natural Dyes” tag. I did some updates on color fastness too.
You can also ask me a question in the comments.


Pingback: Summer Dye Wrap-up | Deep in the Heart of Textiles
I love this chart, what a great way of keeping notes and presenting your results. I may well need to copy this idea one day when I am feeling particularly organised! And so many lovely colours…
Thank you! Since I had such a hard time finding identifications on some of these plants, I especially wanted to keep a record of them. I think of you as very organized! And I would love to see a chart from you too. Since you have done so many more experiments, it could take a long time to sum up your knowledge, so maybe just chart 5 or 6 at a time. We will all benefit!
I know this is an old post but it looks like you are still active on your blog so here goes – when you say processed in a hot pot for 5 days do you mean you simmered it on a hot plate for 5 days?
Thanks for this useful post.
I am glad you find it useful!
I had to re-read it myself to remember what I did — at the top of the post I summarized my two methods, so I simmered the dye material for about 2 hours, then added the yarn and simmered another two hours, then just let it cool in the pot for the amount of time I noted for each dye material. So for eastern baccharis, I left it in the pot for 24 hours (no further heat from the hot plate), and for pear, I let it sit in the pot (ambient temperature) for 5 days. I am pretty sure I was following the recommendations from Jenny Dean’s book Wild Color. I think the important thing is not to rinse out the dye right away; to let it bond fully with the wool. Hope this helps!
Hi. Thanks for visiting and following my Blog. I like the way you have presented the dyeing results. I am starting a project in the next month or so, writing poems about dyeing materials with plant dyes. I’ll be having a look at you posts as I go! Jane
That will be great! I already like the combination of nature study and art that natural dyeing entails – I would never have had an idea to add poetry to the mix and I am looking forward to your creations!
Very interesting – I shall refer back to this again!
Lovely little chart there, Ranger!
Thanks! I hope I add more to it someday, but I didn’t do any dyeing at all this year!
I agree with the earlier comments – a very organized way of showing your results. I’d like to know: how do you set it up to appear that way in WordPress? I have difficulties aligning images with text and usually just let things appear the way they want to.
I always admire quilters for their precision and look forward to reading your posts.
I am pretty sure I set it up as a table in Microsoft Word, and then used the “copy from Word” tool on the WordPress post page. And now I don’t even see that tool available, just the “paste as text” tool. However, later I changed my theme to the one I have now, and the table didn’t automatically fit the new page width, so I actually had to go into the HTML version and figure out how to set column widths.
You could also do a table in Word, then save it as a PDF, then insert the PDF the same way you usually upload a picture.
I would really love an easy way to do tables and timelines right in WordPress!
Pingback: Textile Ingredients | Deep in the Heart of Textiles
Thanks for stopping by and following my blog! I’ve been scrolling through some of your posts and this one is perfect for one of my nieces so I’ve shared it with her on FB. Love the name of your blog…it’s perfect. Although we don’t live there now we’ve lived in Texas many times and we love it!
Your blog has so many interesting things on it – I am looking forward to exploring more than I was able to today!
Pingback: Just Because It’s Natural Doesn’t Mean It’s Better | The Snarky Quilter
Wow – I can’t believe how bright that pokeweed got! Finally I have a use for it now. 🙂
How do you dispose of your copper liquor? I’m a little nervous to dump it down the drain or in the yard.
Hi, I am sorry it took me so long to answer this! I looked at it on a mobile device and then forgot to answer when I had a real keyboard to use.
I haven’t disposed of the copper liquor — I just keep it in a big jar and add more vinegar from time to time. But if I were going to dispose of it, my county has a recycle station where we can take old paint and chemicals, and I would take it there. Jenny Dean in her book Wild Color says it does need consideration, and she says to consult your local environmental agency, because laws are different from area to area.
I’ve never dyed with anything other than a tea bag, but I very much want to learn. I just wanted to say…I’m very impressed with your attention to detail and the plant species you used. I’m a botanist, and I was looking around my back yard at all the plants I had growing there, wondering about the color possibilities they might have. I found your site because almost all of the plants I was wondering about are in this very chart…even Crataegus marshallii! I look forward to browsing around and finally trying my hand at dyeing. I was already considering buying Jenny Dean’s book…you’ve got me sold!
Oh hurray! I have not done much dyeing lately but I think about it whenever I look out at those plants.
I had my best results with Texas Dandelion; the colors were gorgeous! But all the yarn disintegrated about a year later. I don’t know if it was because I didn’t ever rinse the yarn ( I had read that letting it set for a long time really set the color) OR if it was because I used sock yarn, which is part nylon.
I think you will love the Jenny Dean book. Do you have a blog? I would love to follow and keep up with your experiments!