September 2021 Quilt Projects
Since I am apparently just going to make quilt tops for the rest of my life, and never finish them, I thought I would post a few.
A benefit to this photo session was that I got lots of exercise going up and down the steps to take pictures from the balcony!
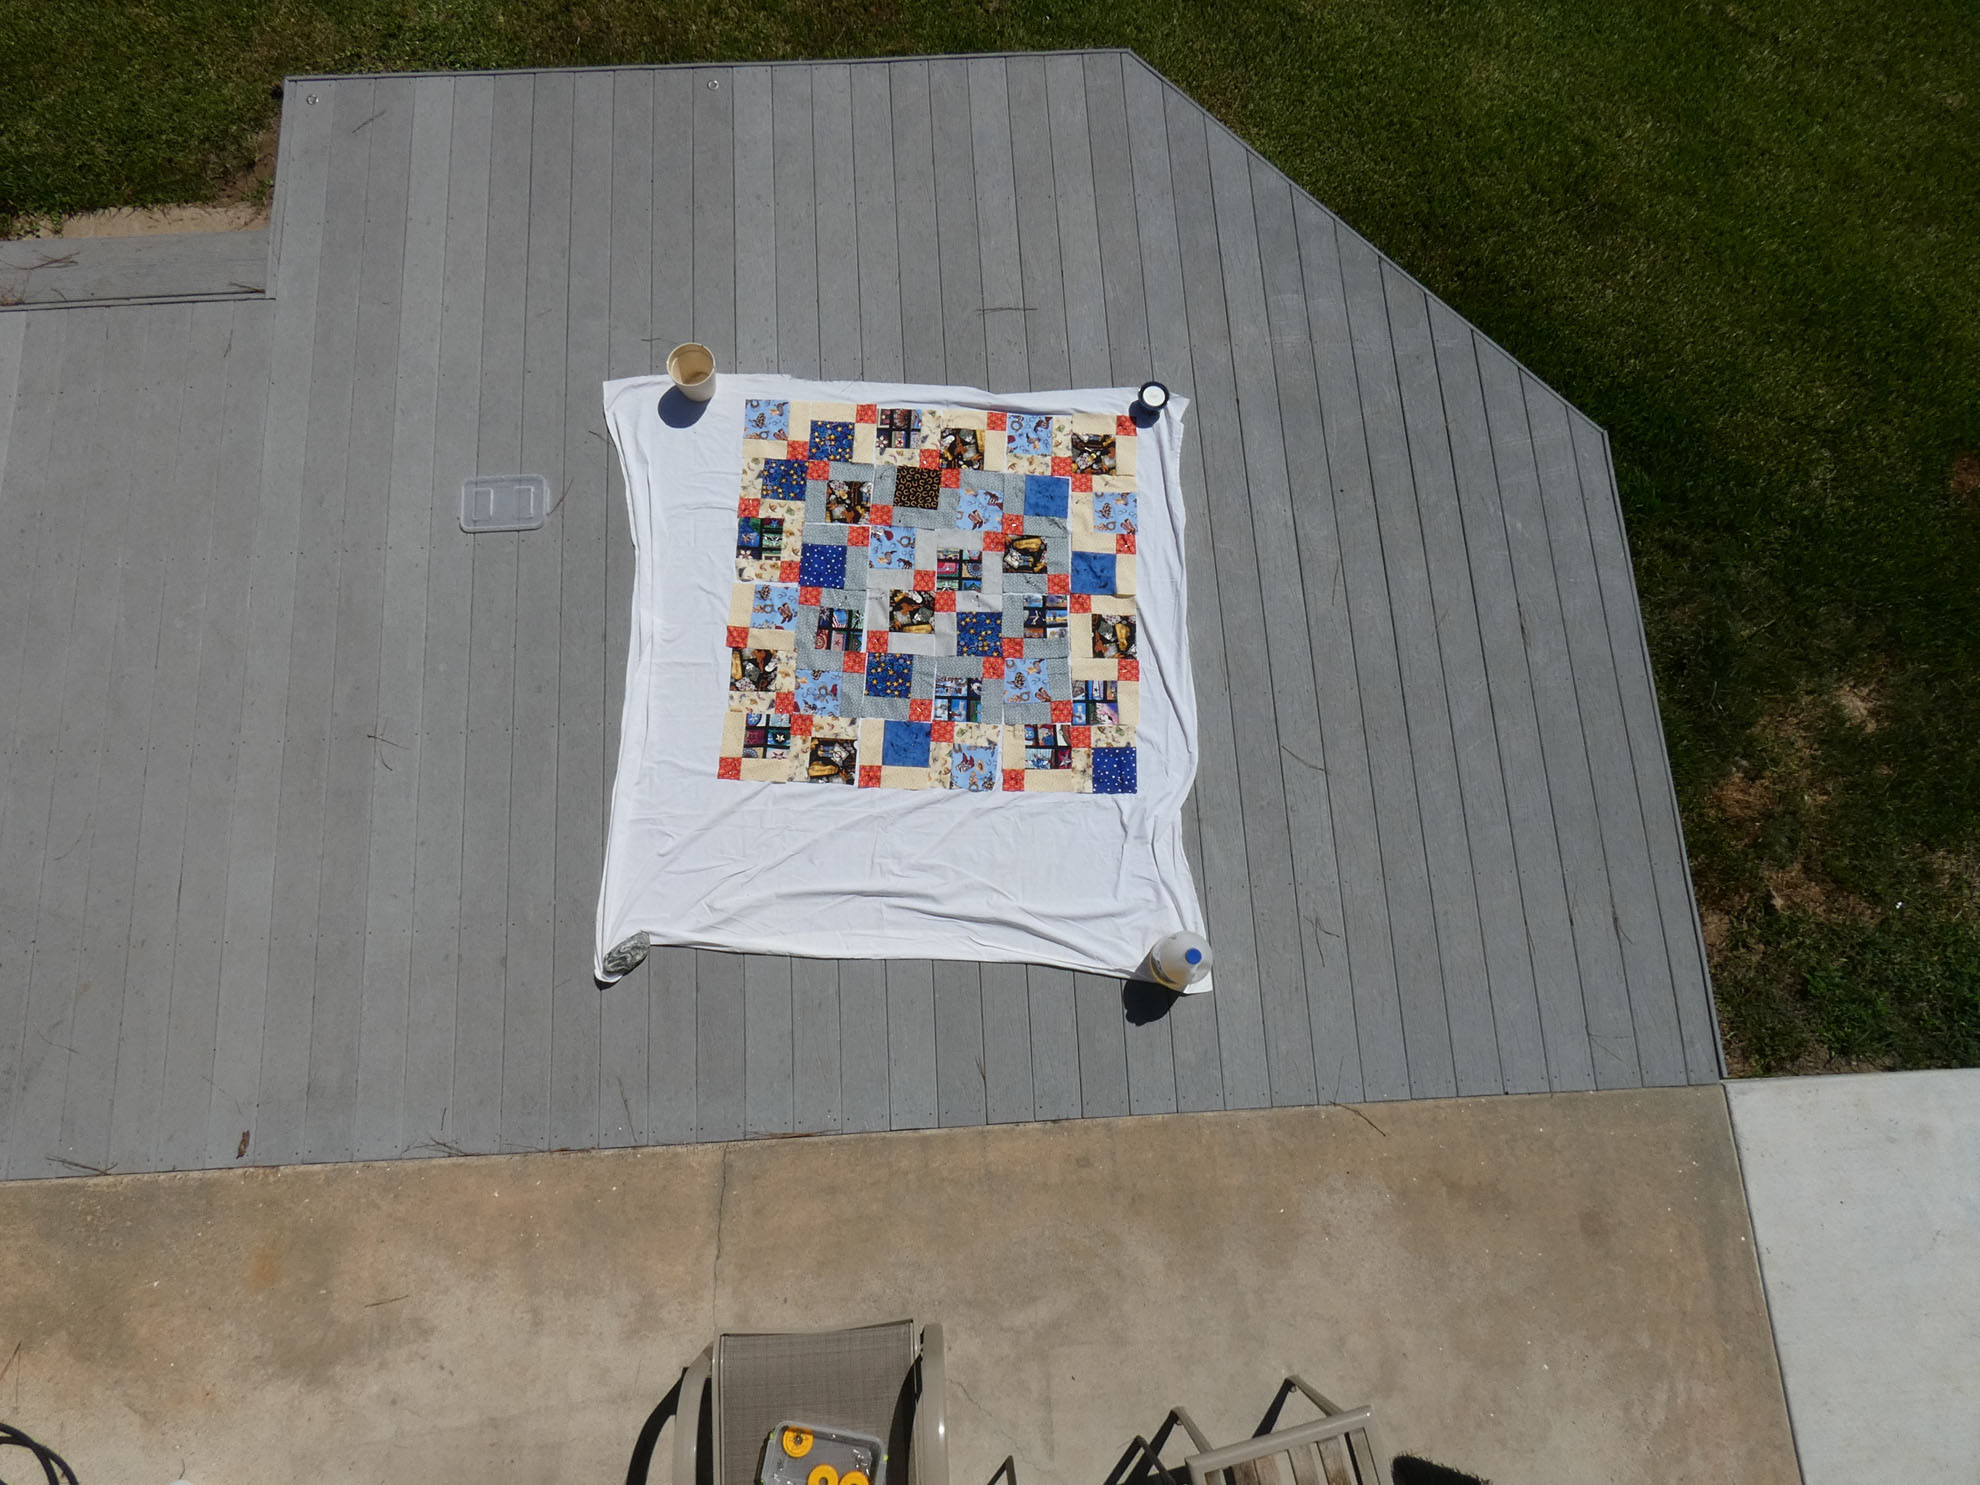
Quilt blocks set out on the deck, as seen from the balcony.
Last year I was given bags and bags of pre-cut squares, and I really enjoy grouping them by theme and color family and turning them into tops.
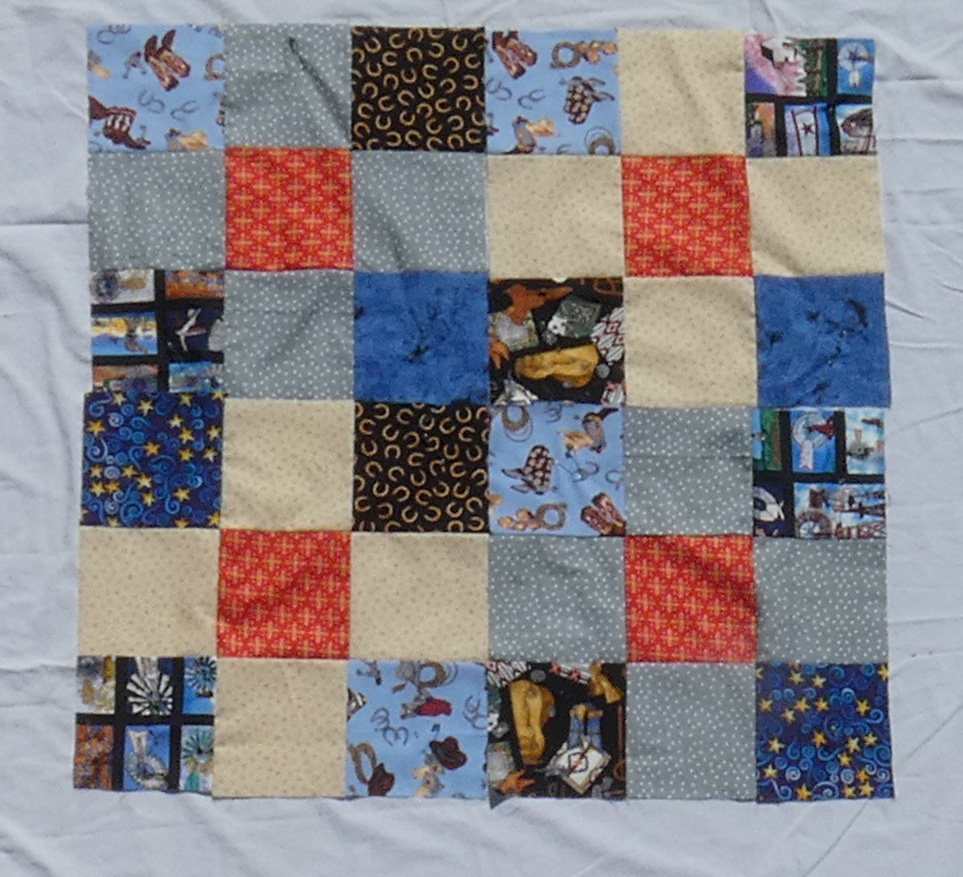
For this first one, I used up every single square of neutral-colored, horse-themed fabric.
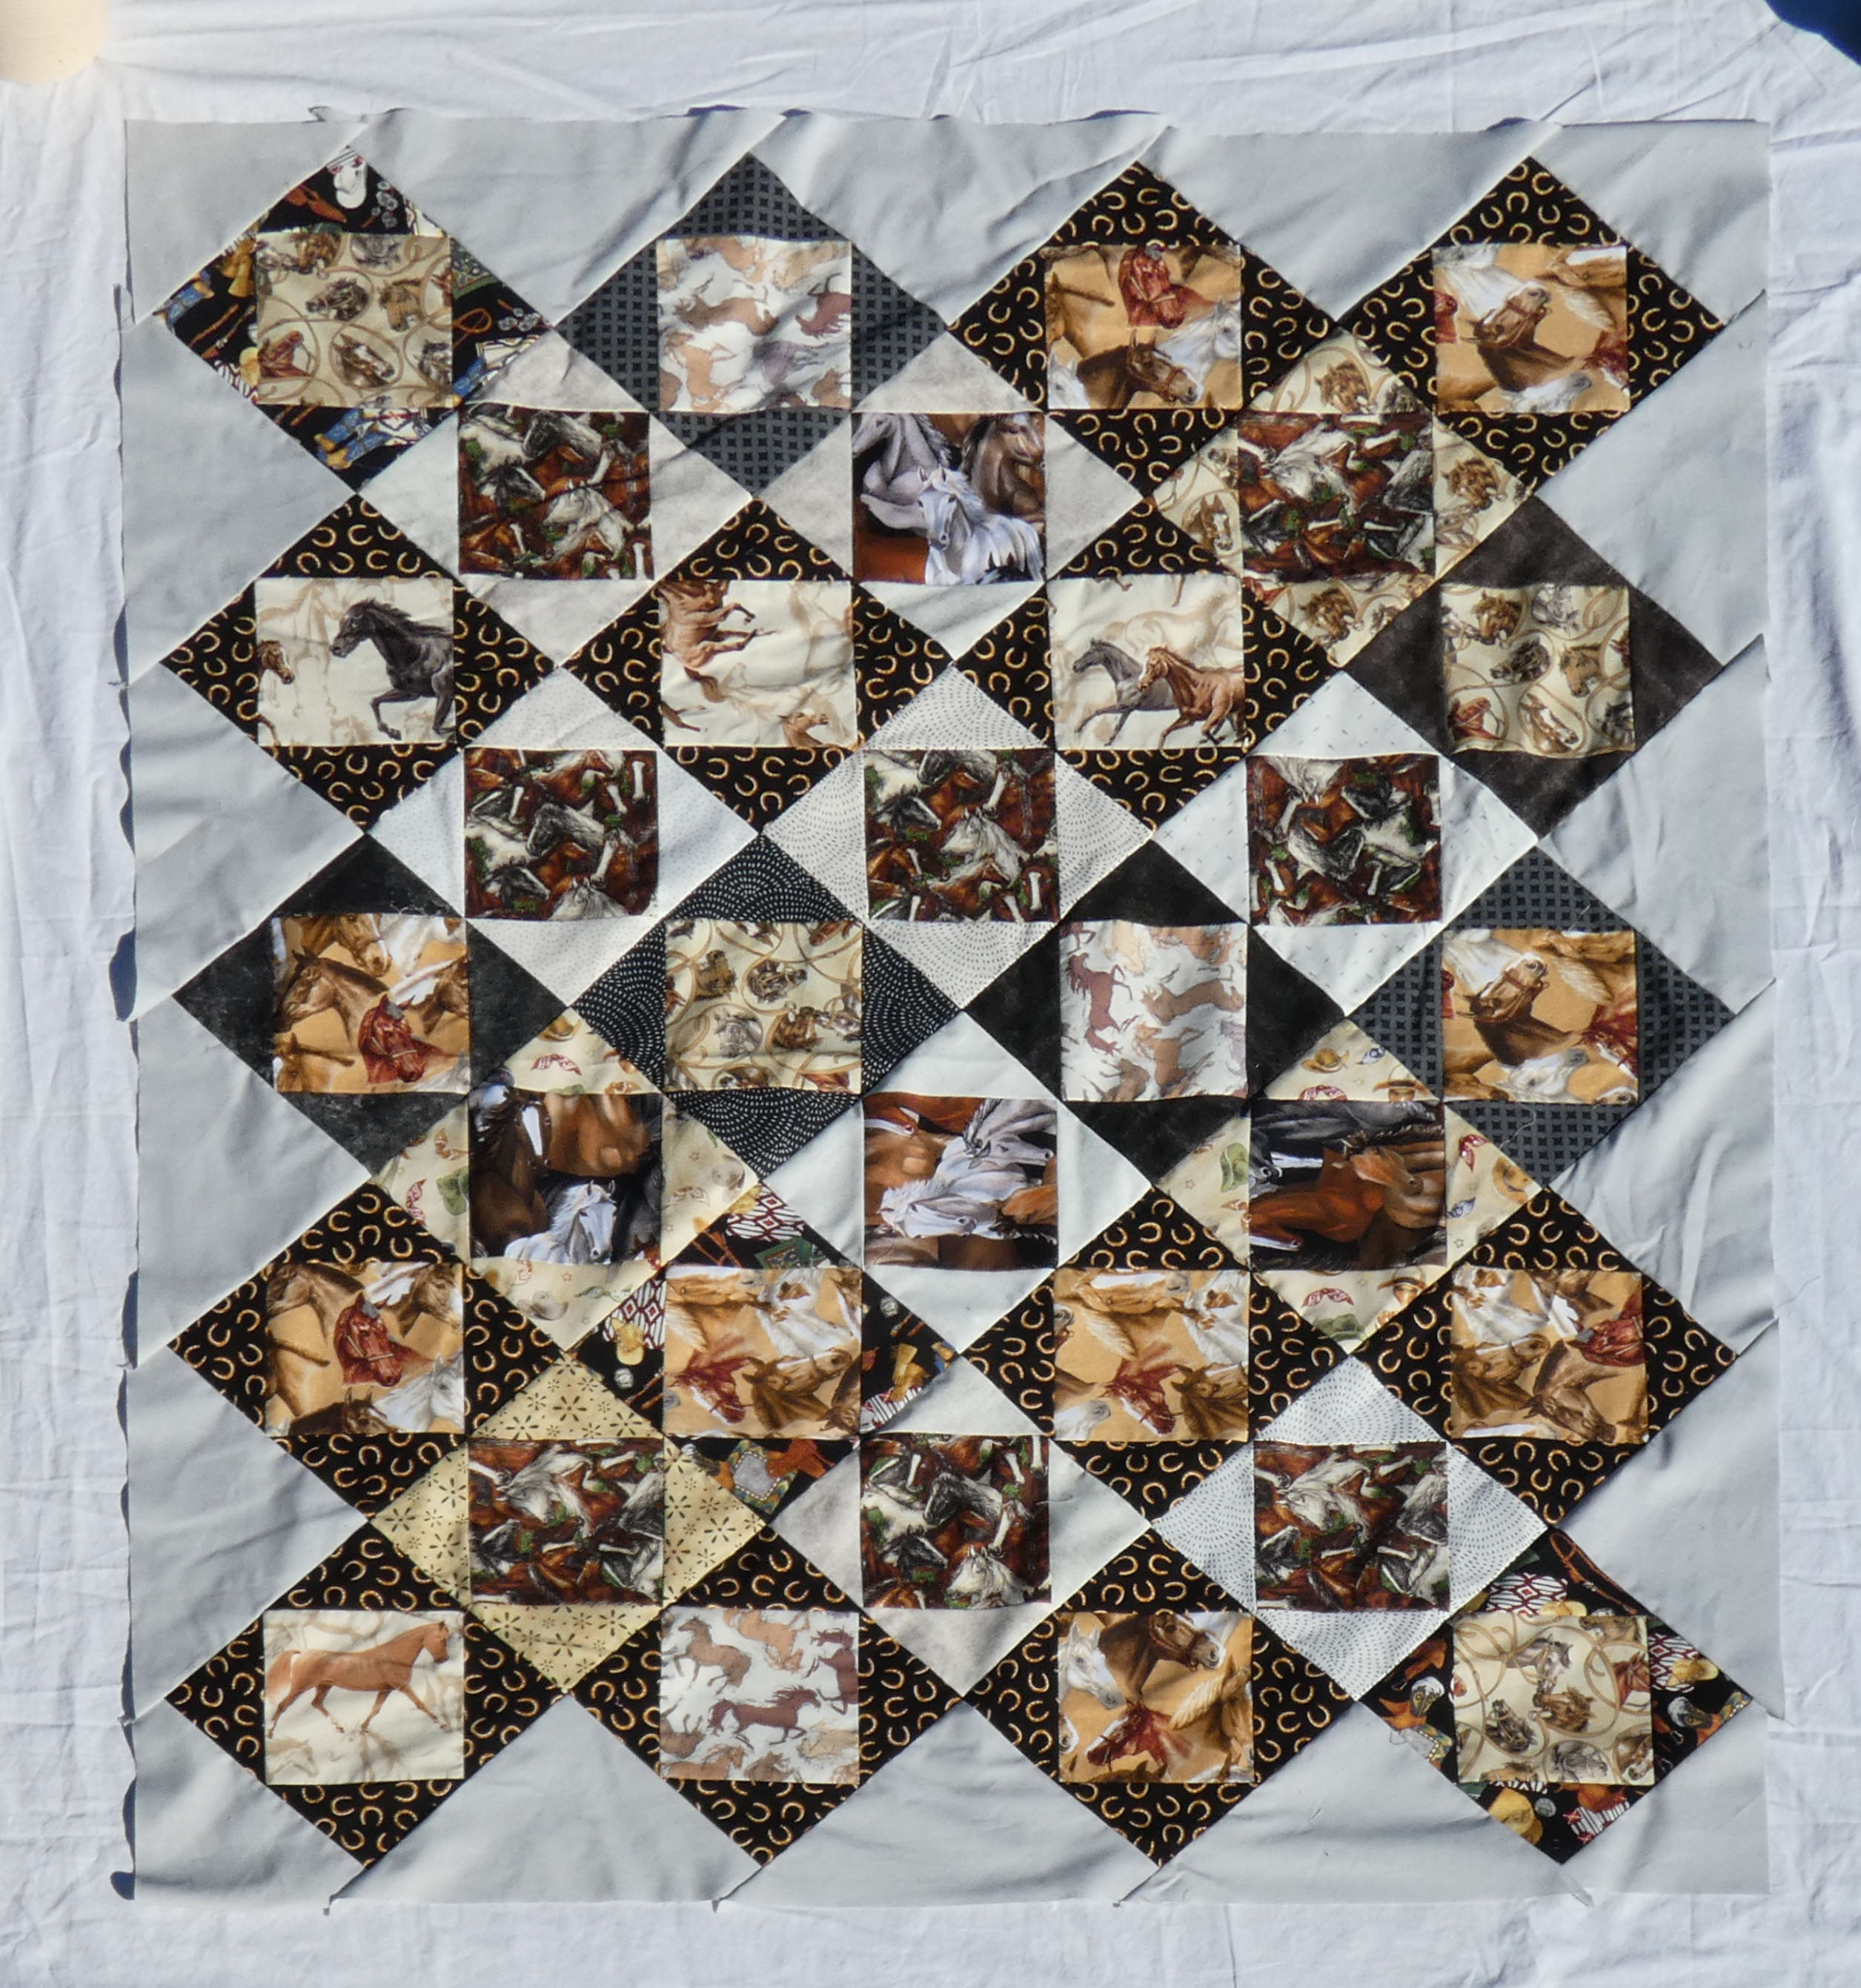
I don’t think I have ever made such a neutral-colored quilt before, but I like it, it reminds me of the mosaic floors at St. Mark’s in Venice.
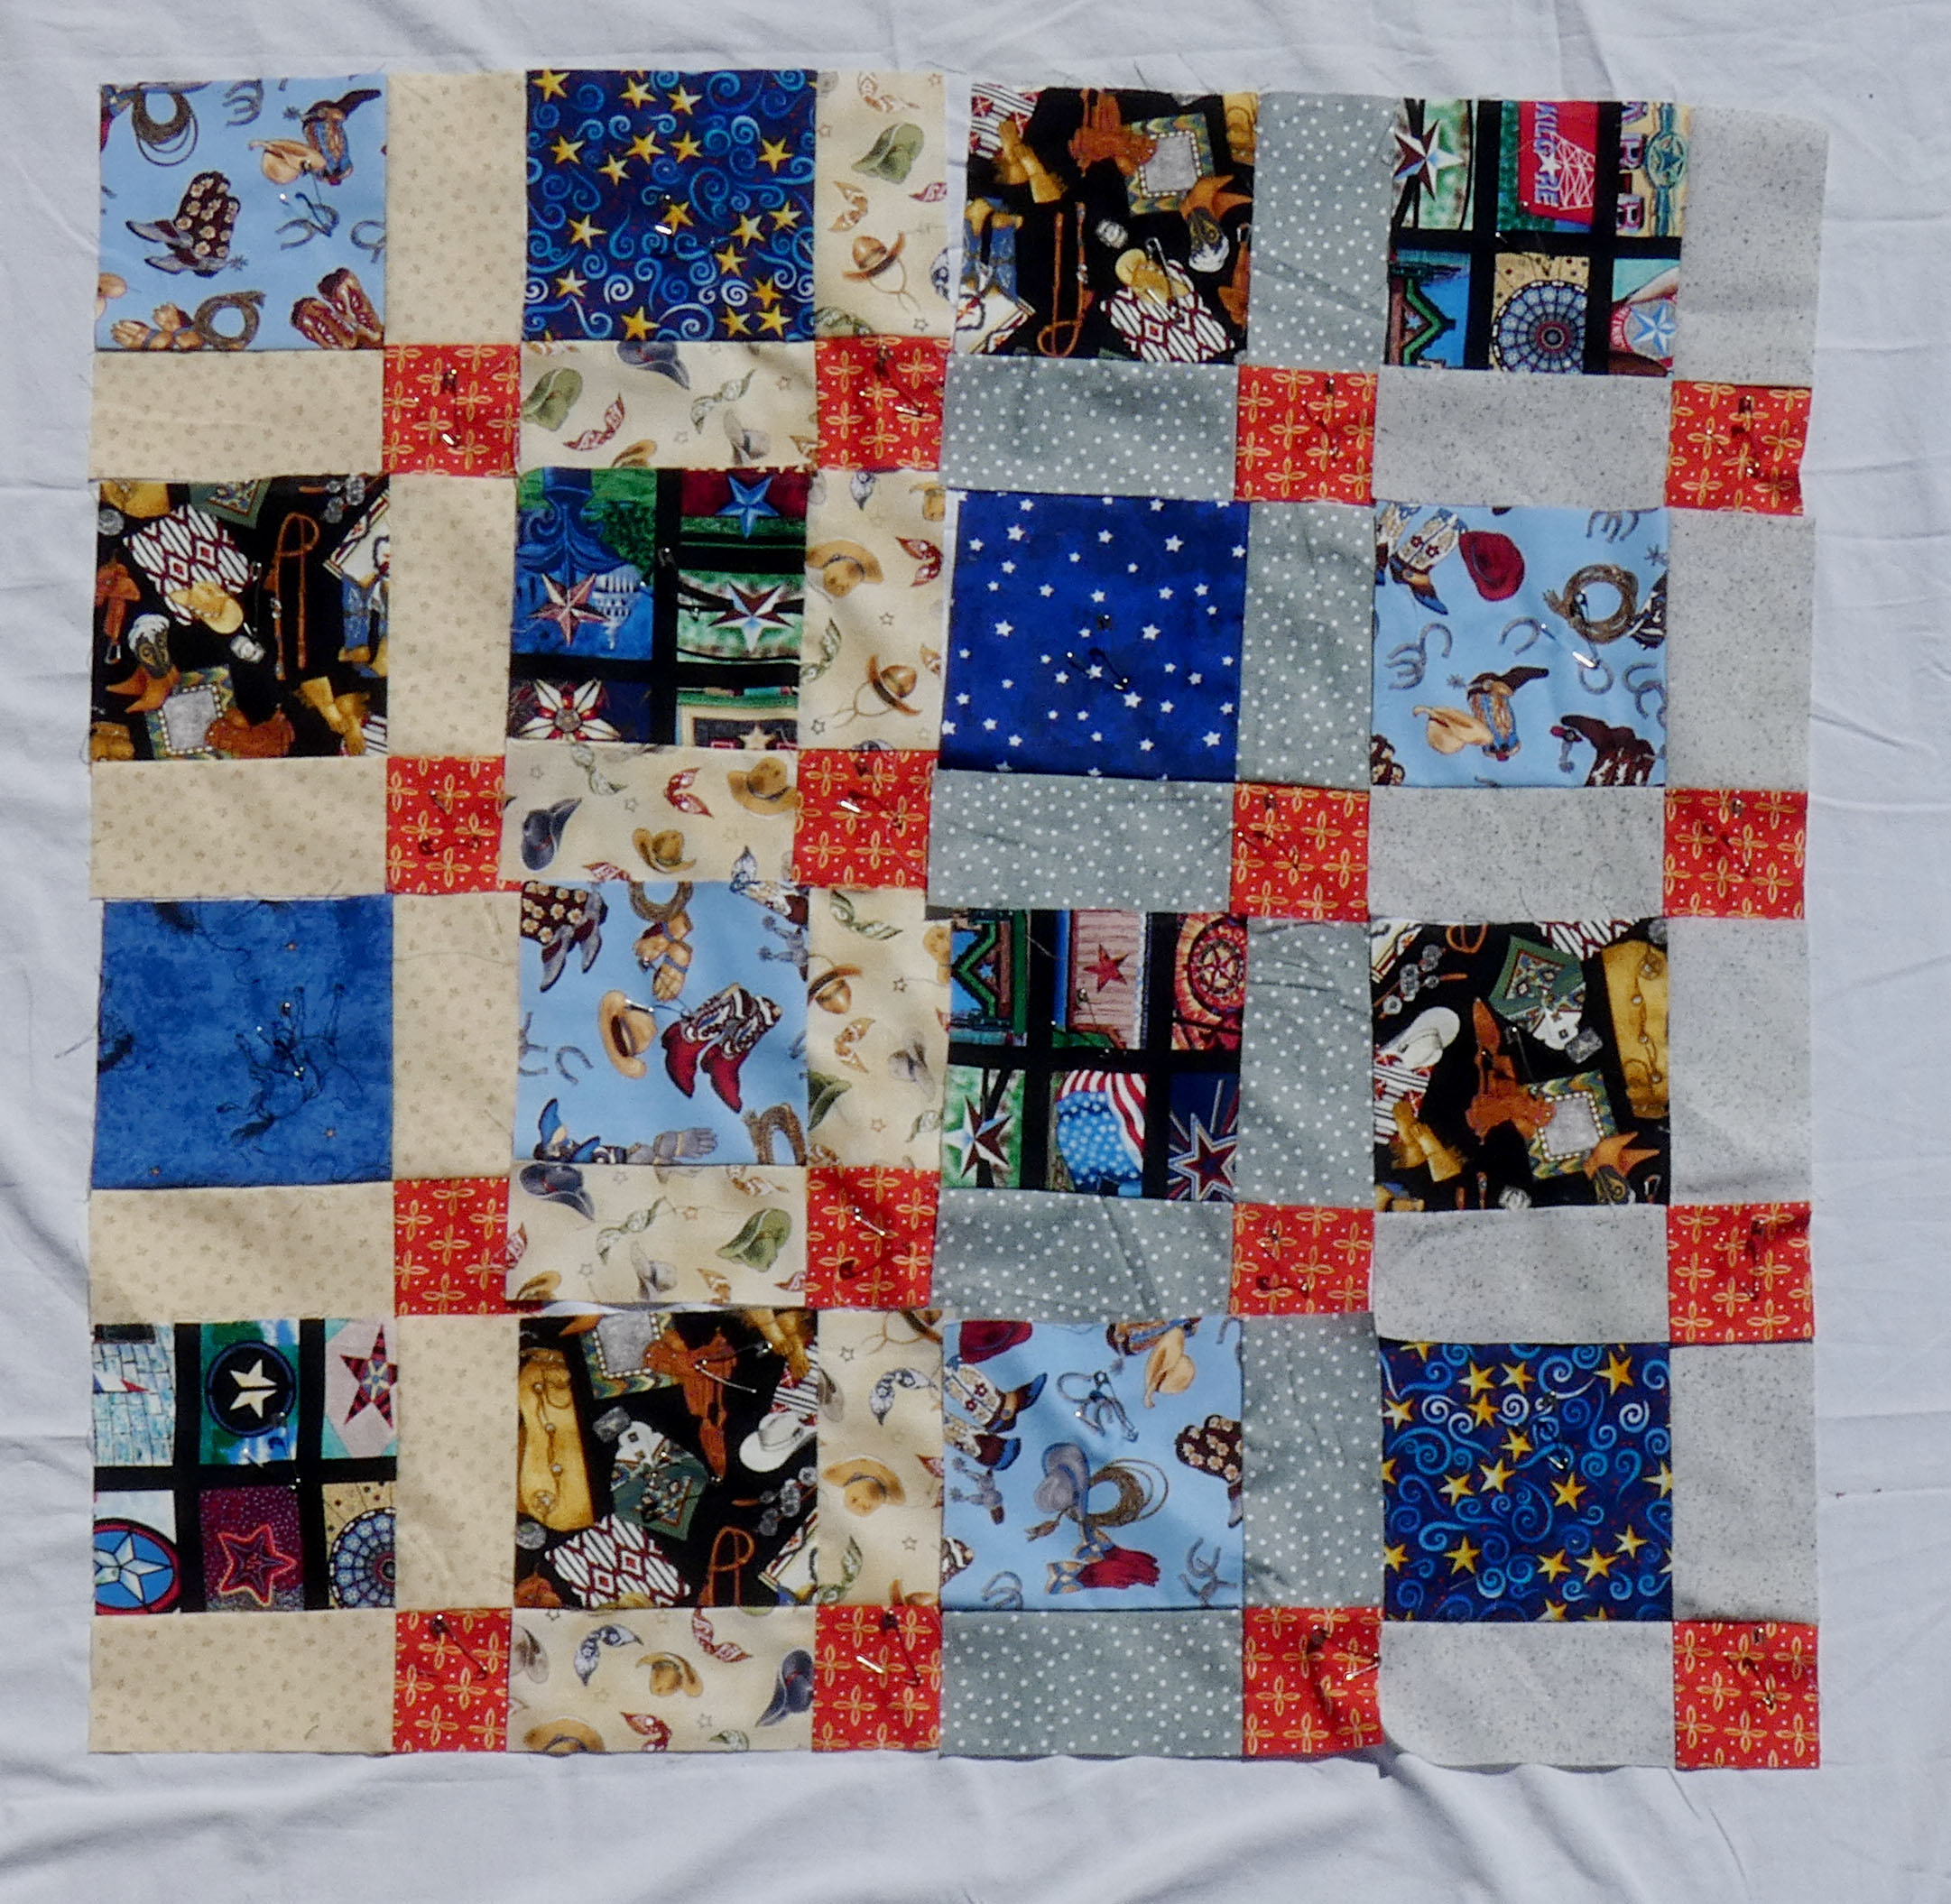
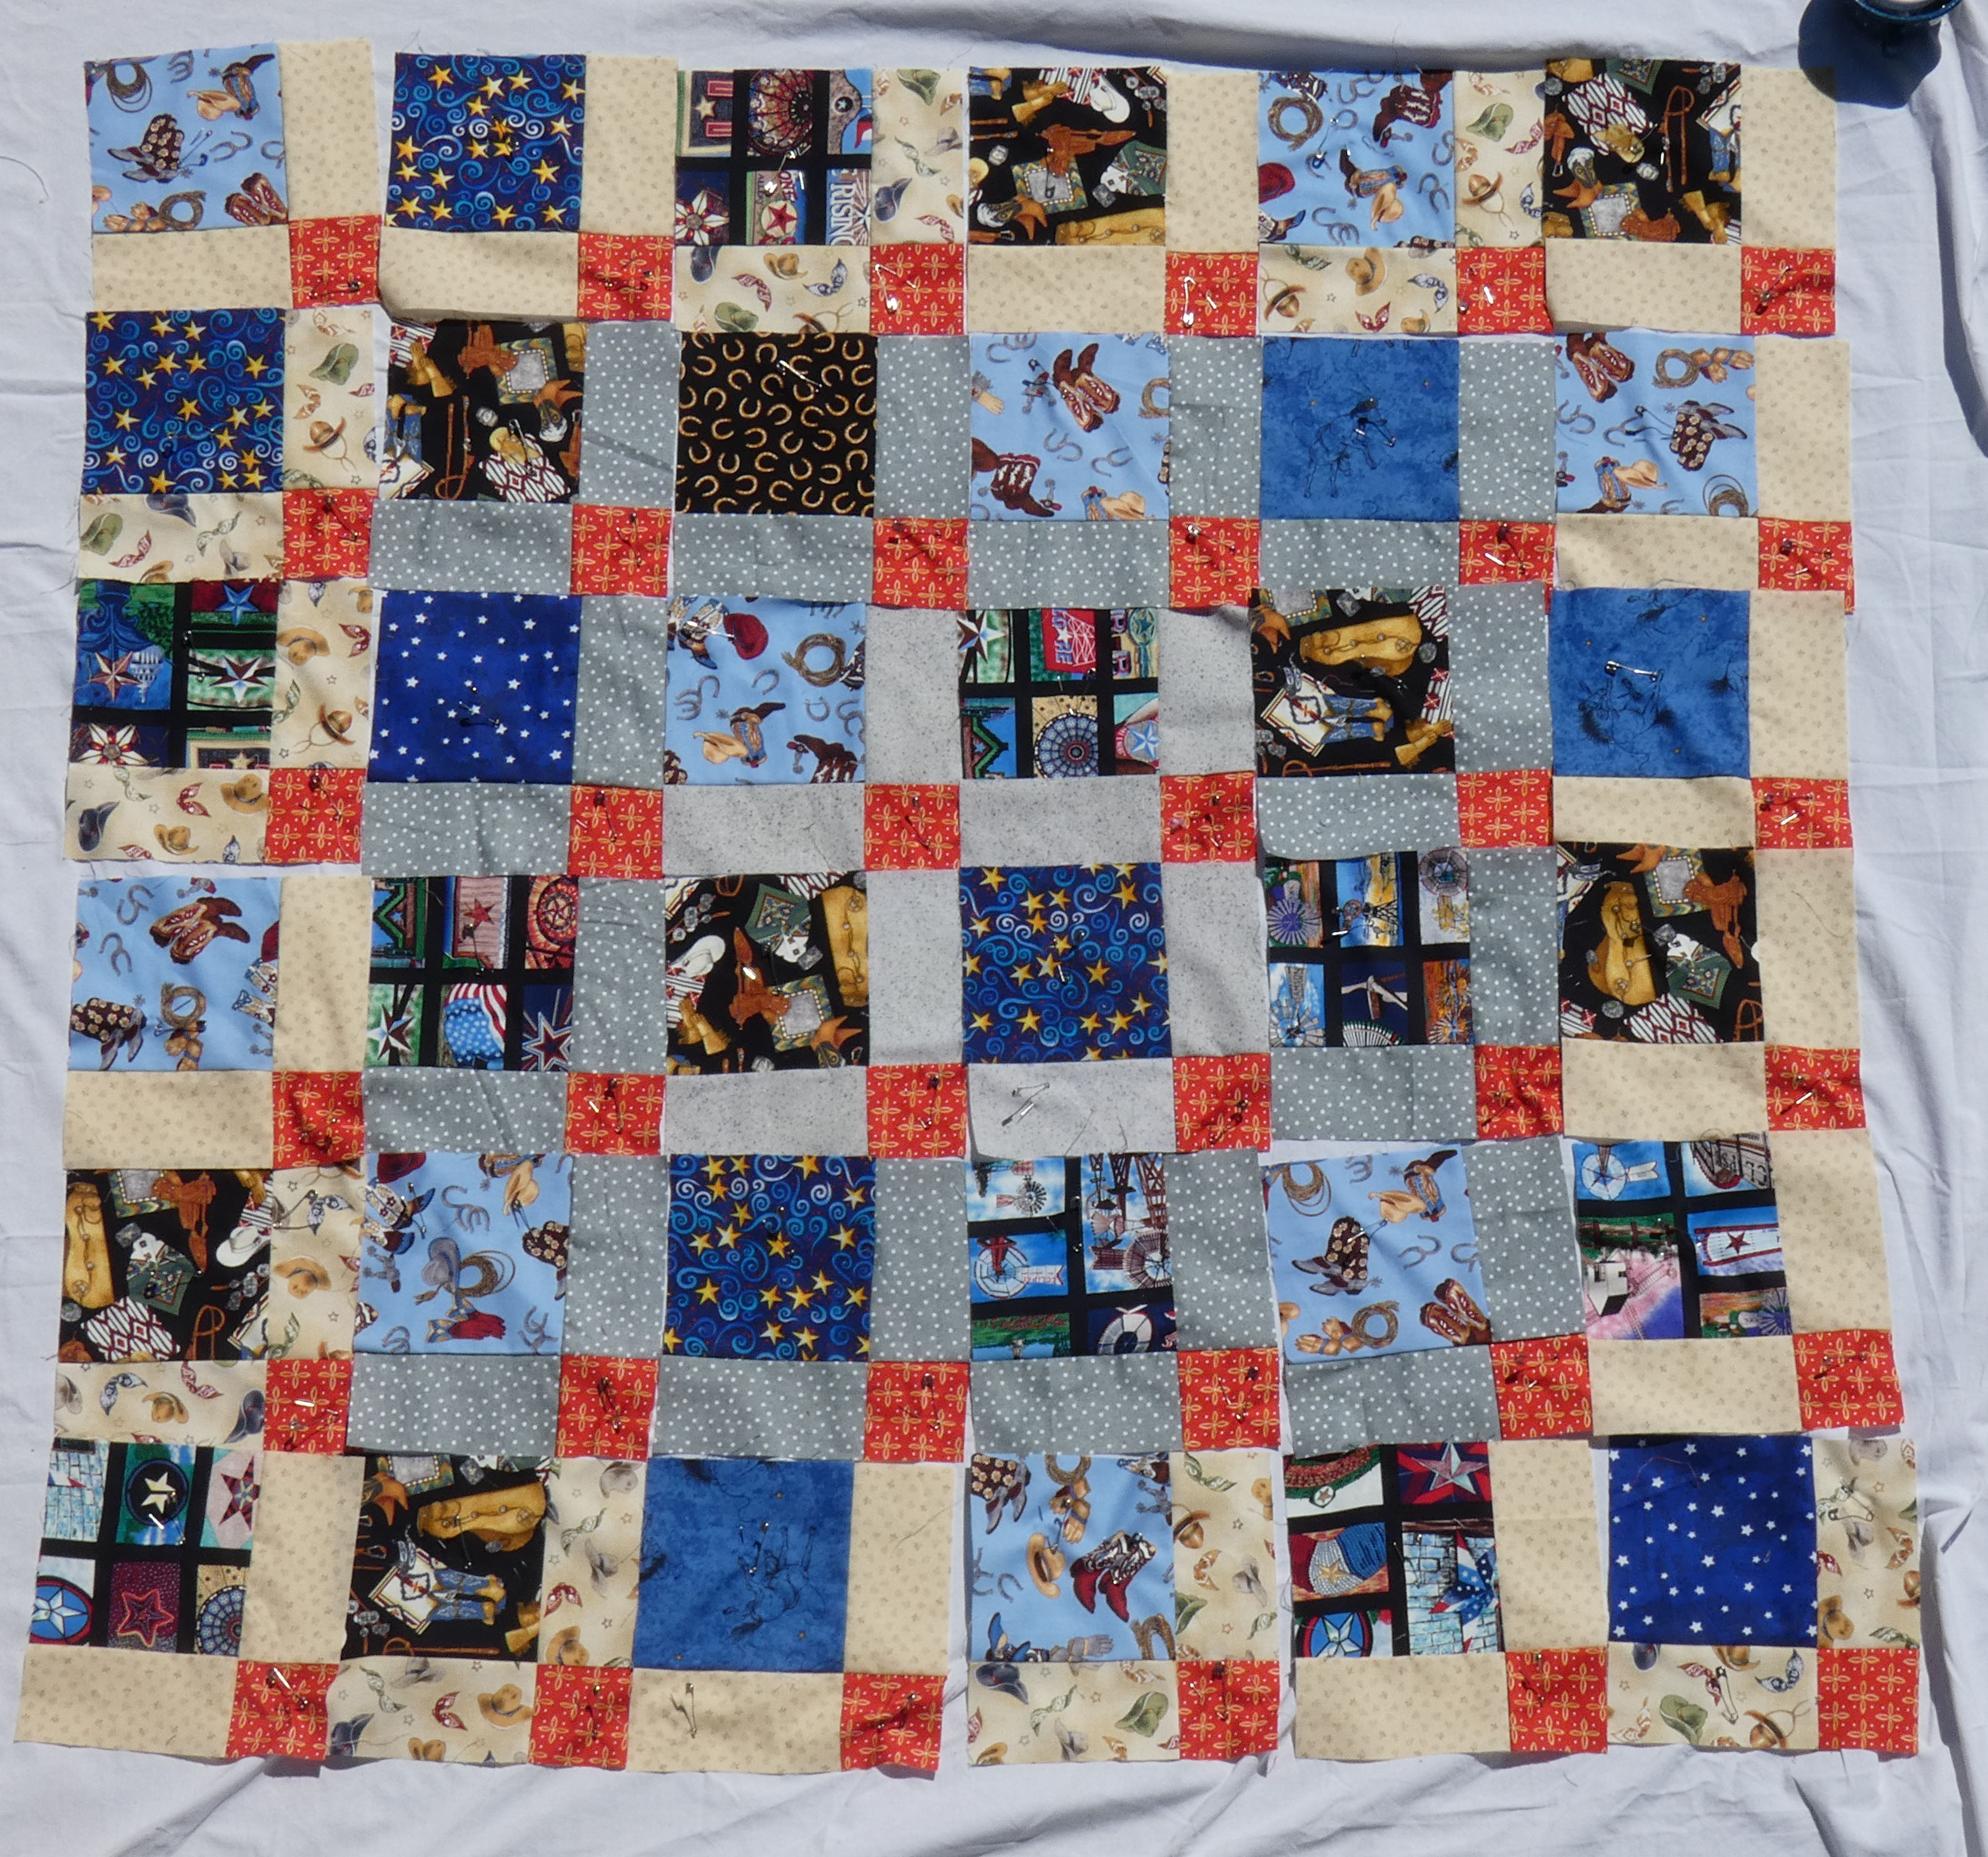
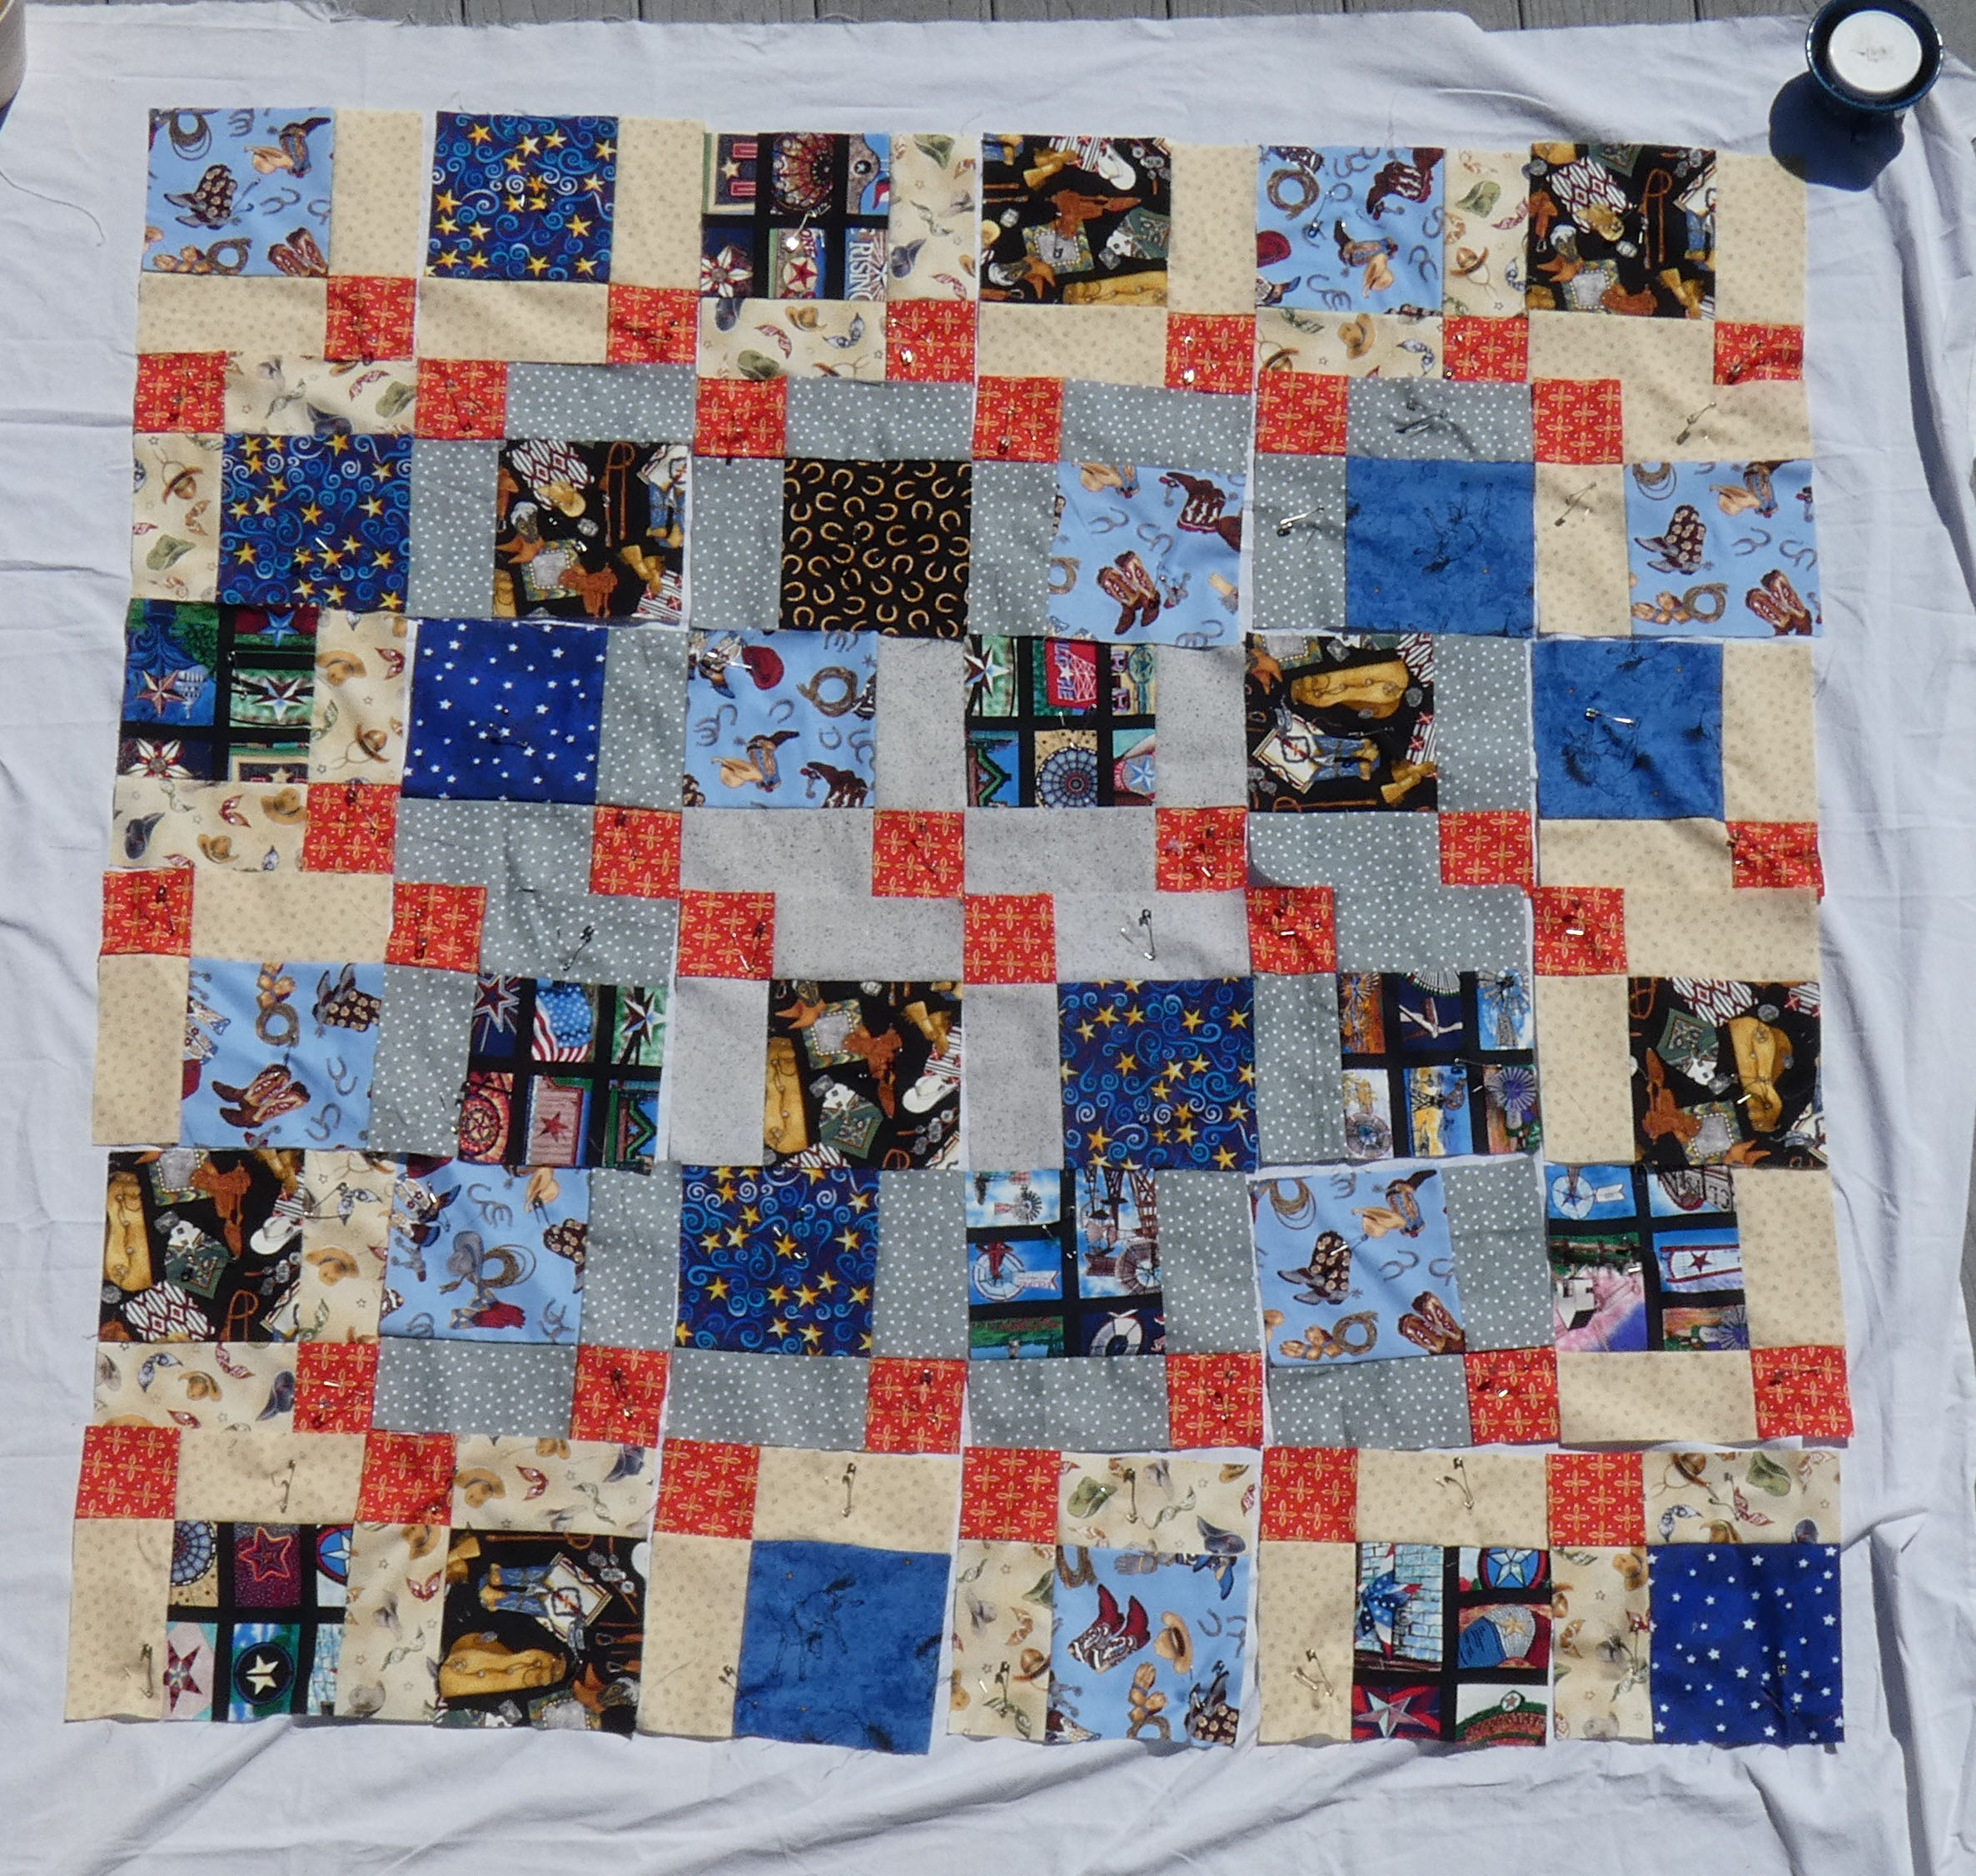
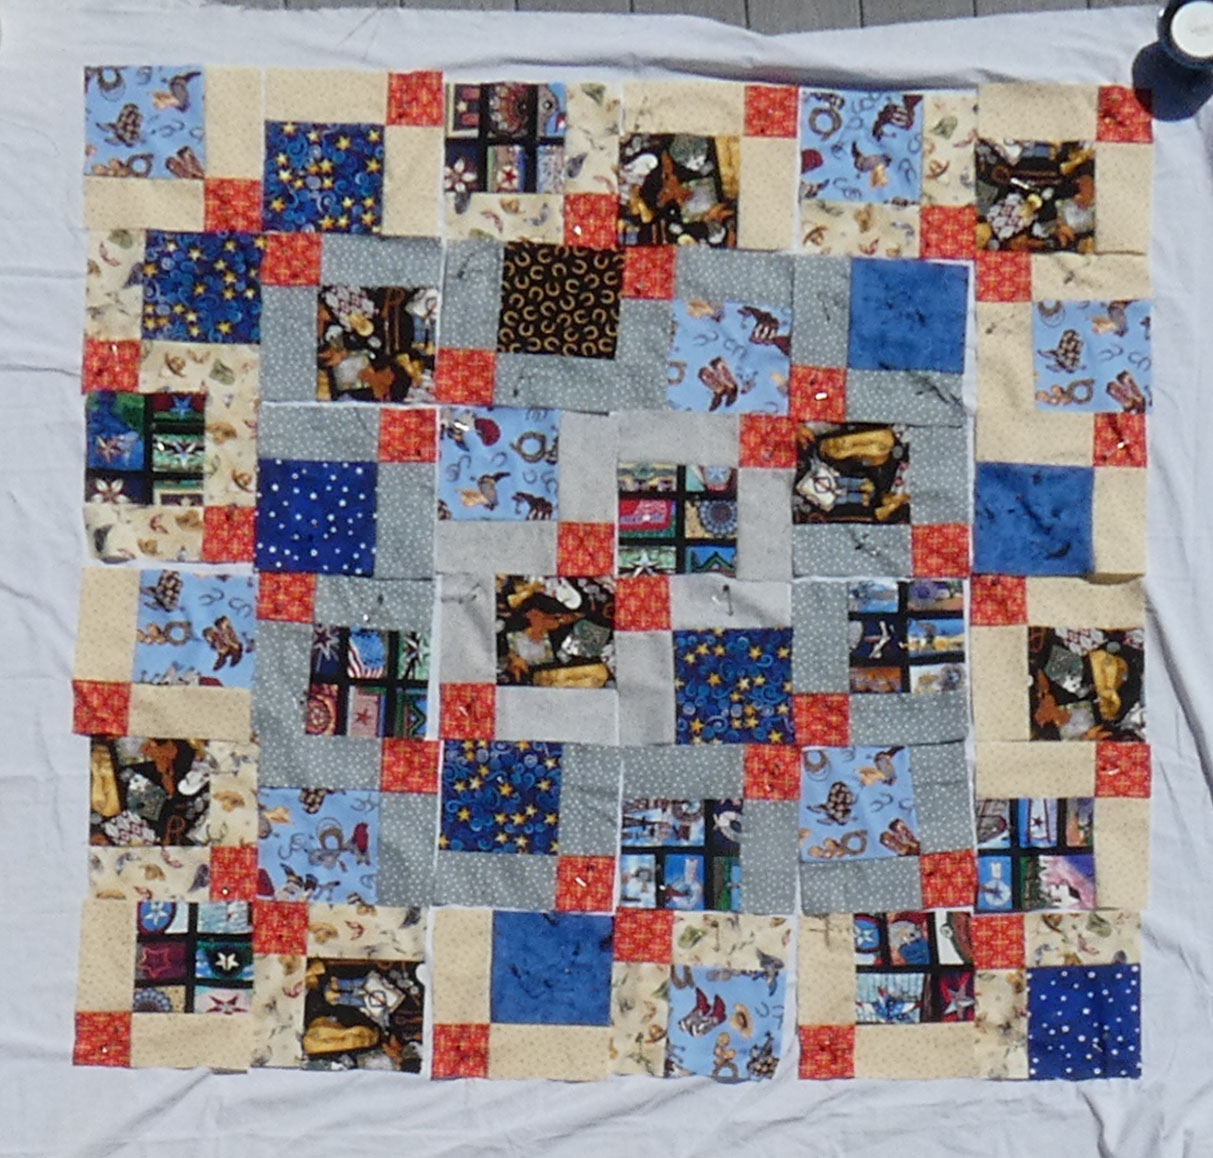
In the donations, there was a huge assortment of kid fabrics that called out to be put into “I Spy” quilts, so I made four alike. There are 48 different fabrics in the large squares, and some repeats in the small squares.
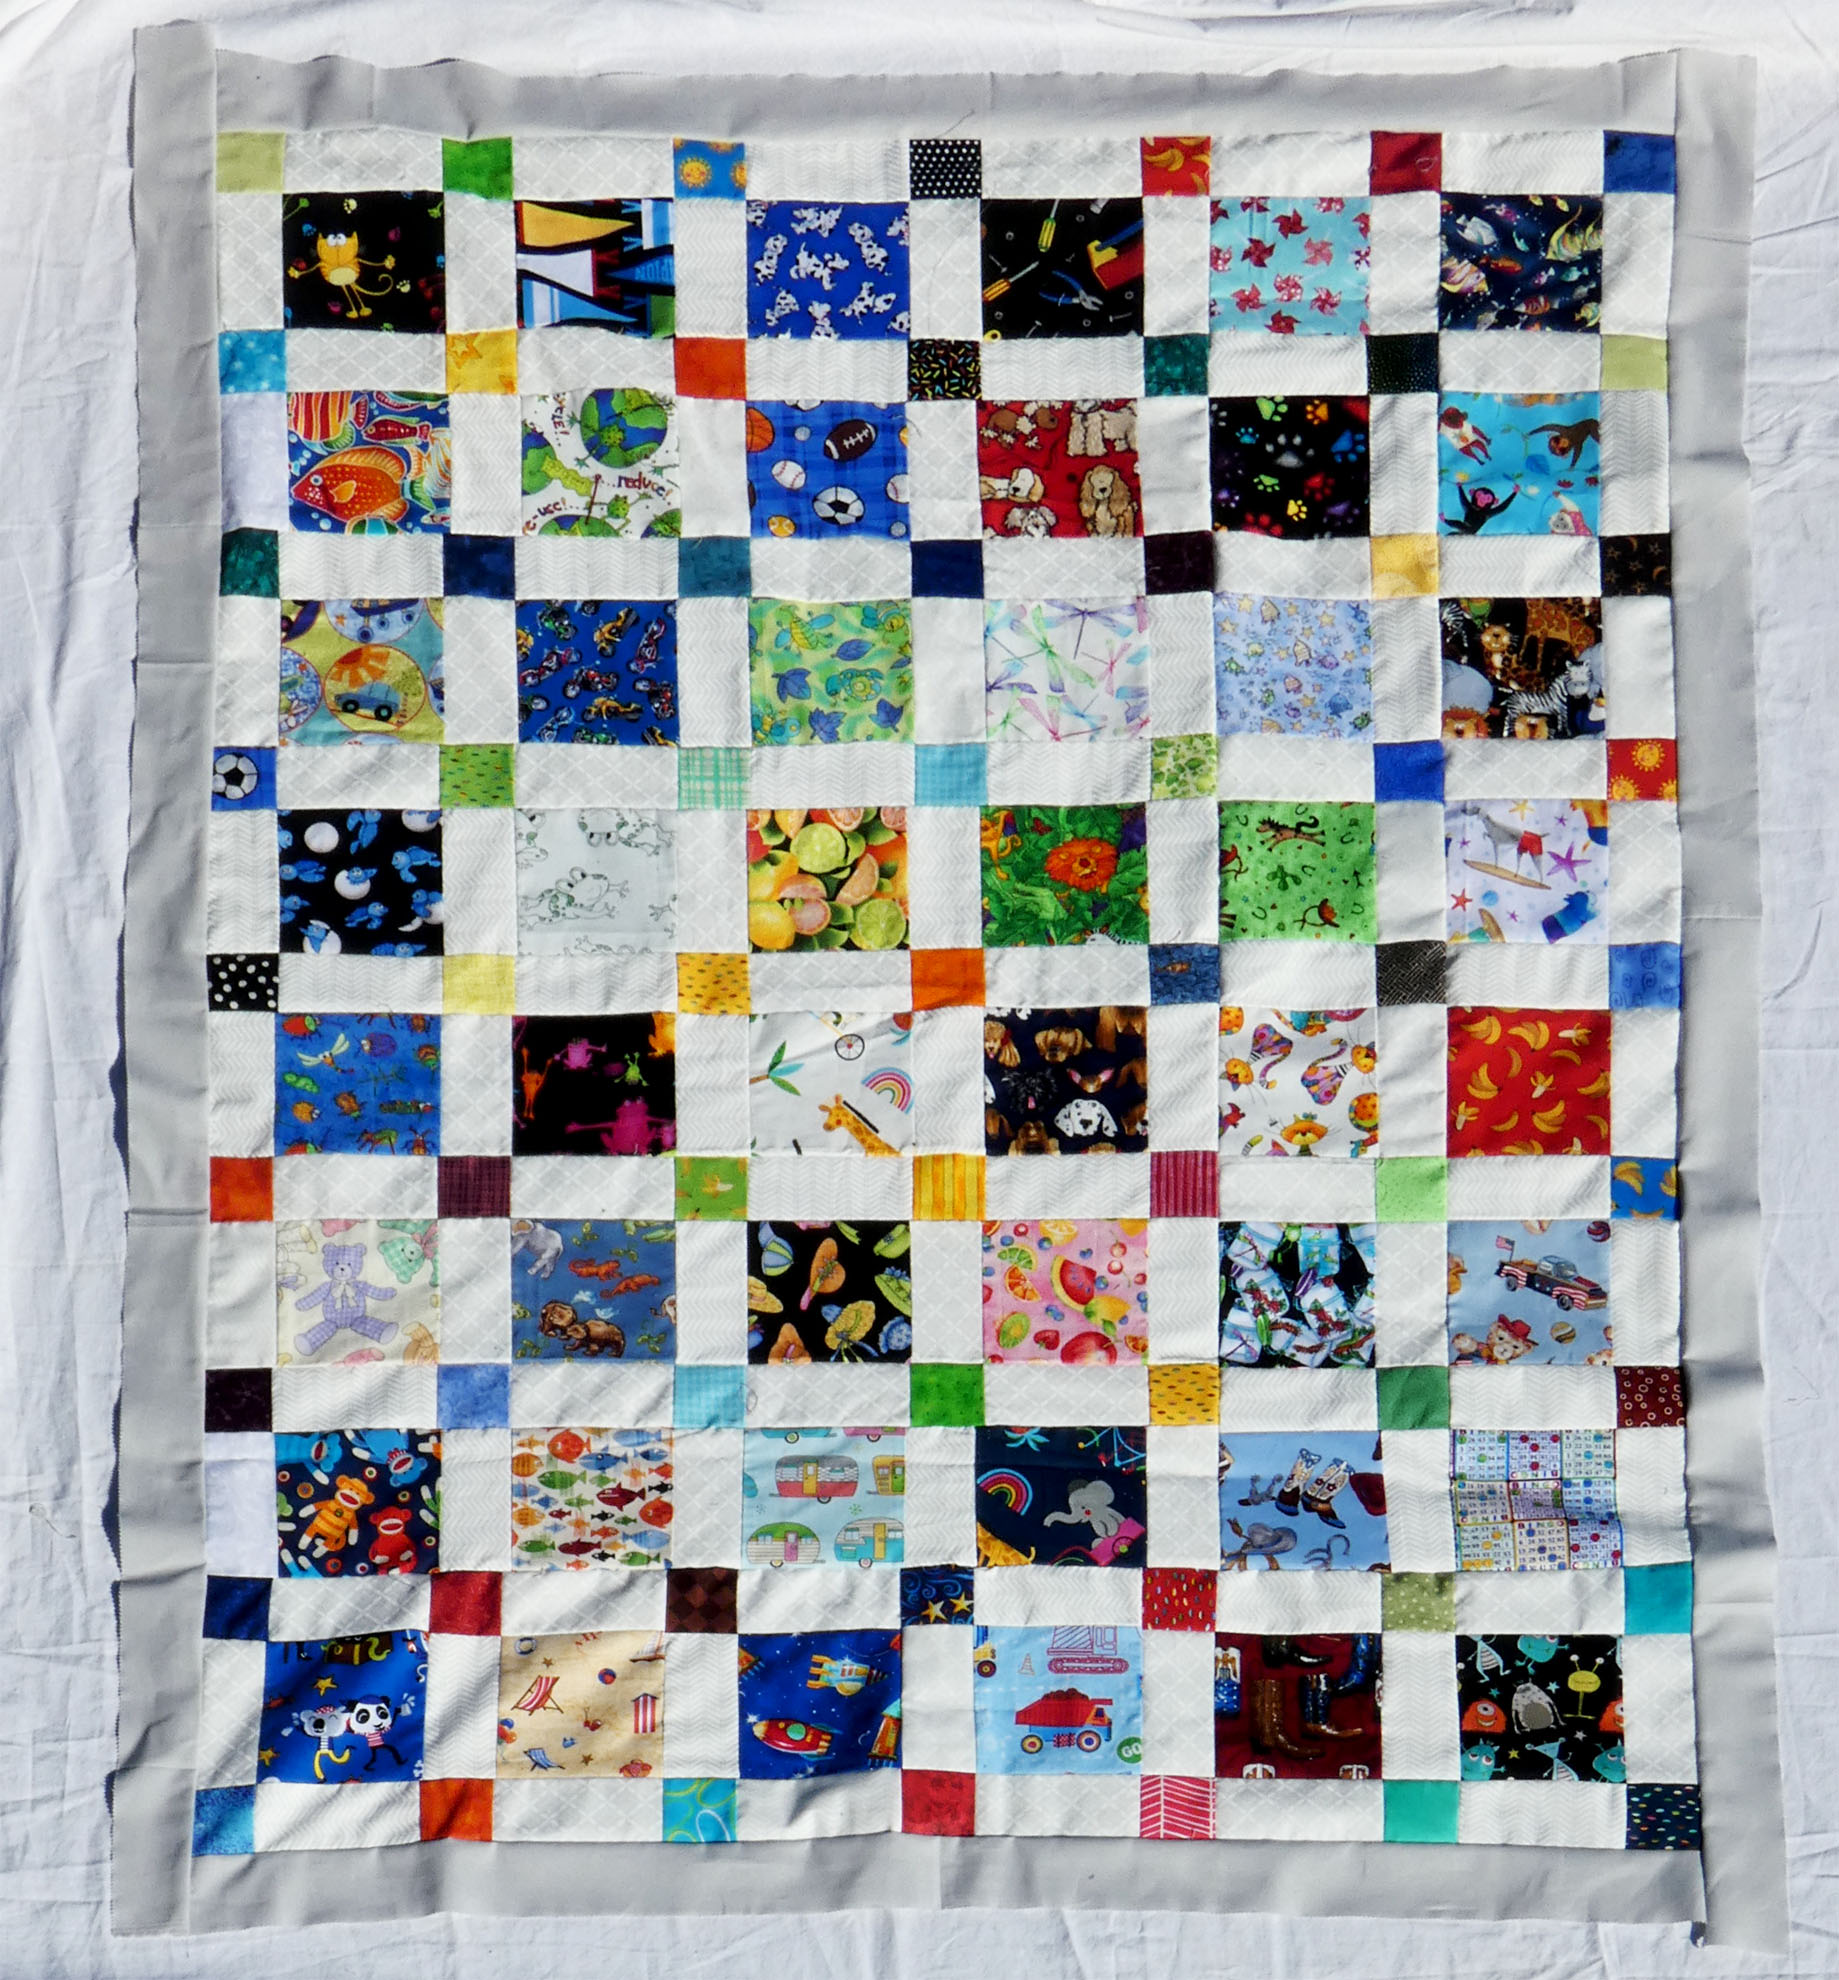
Two of the tops have gray borders.
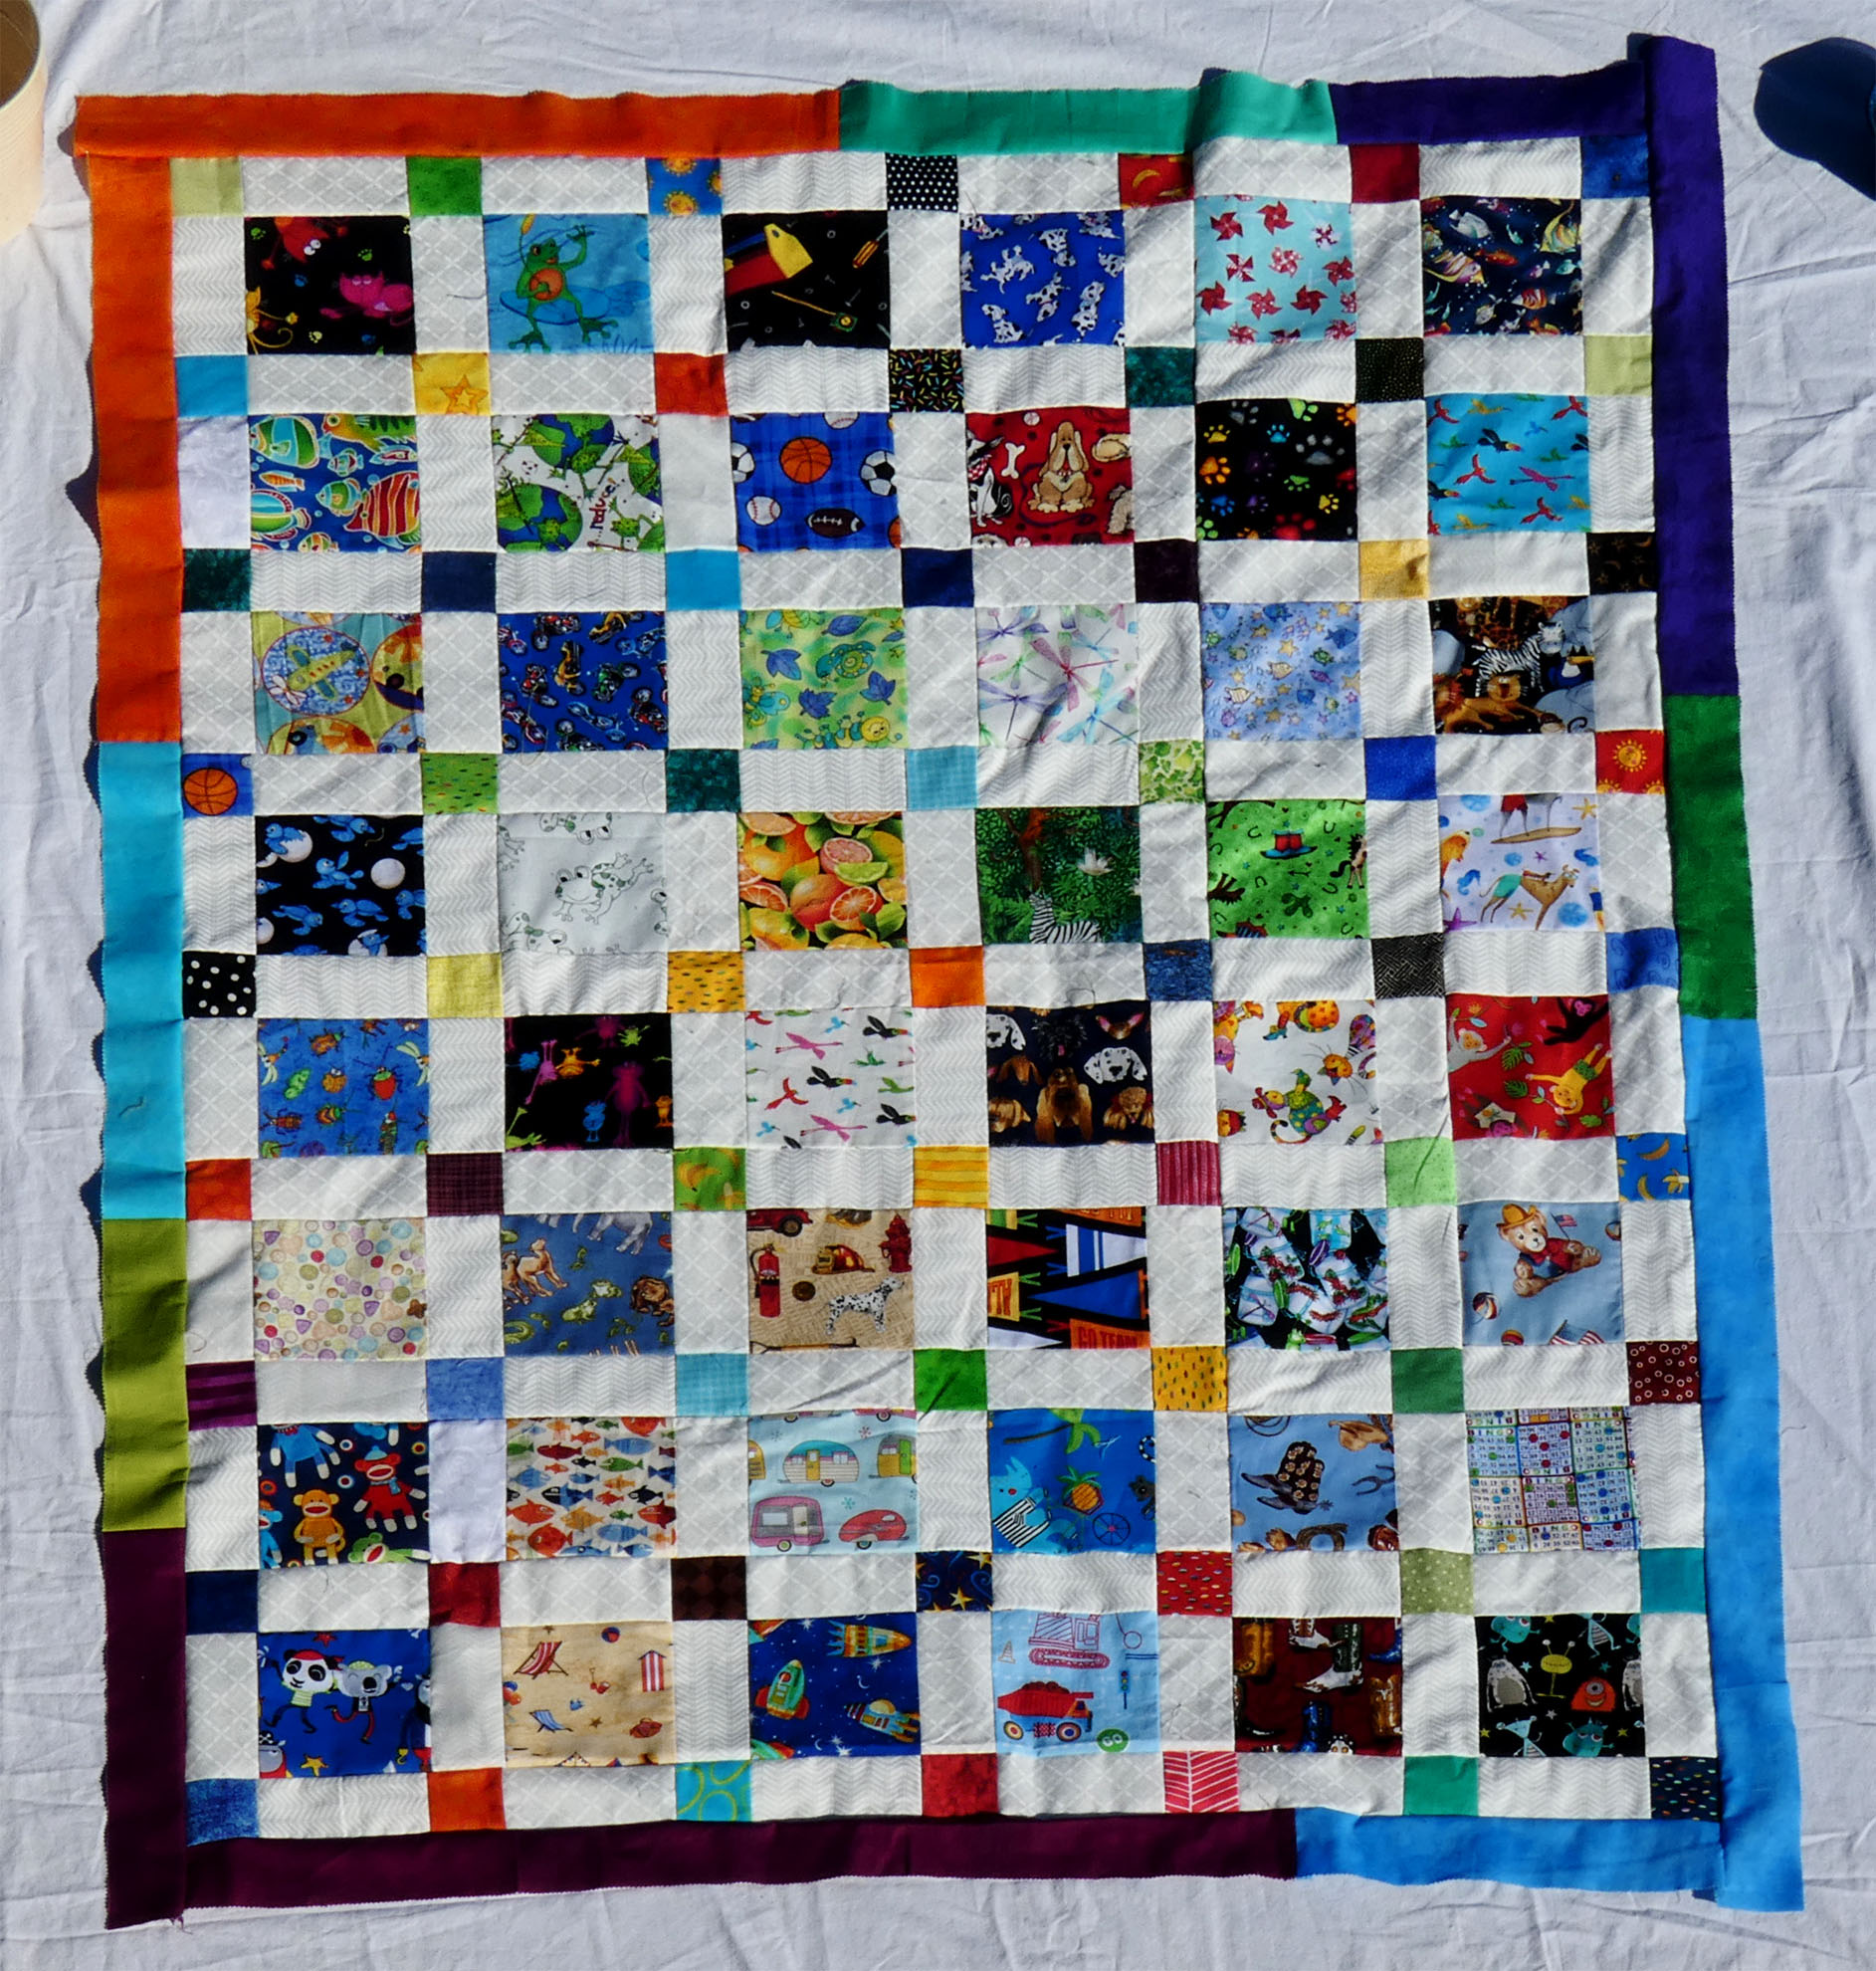
Two have multi-color borders.
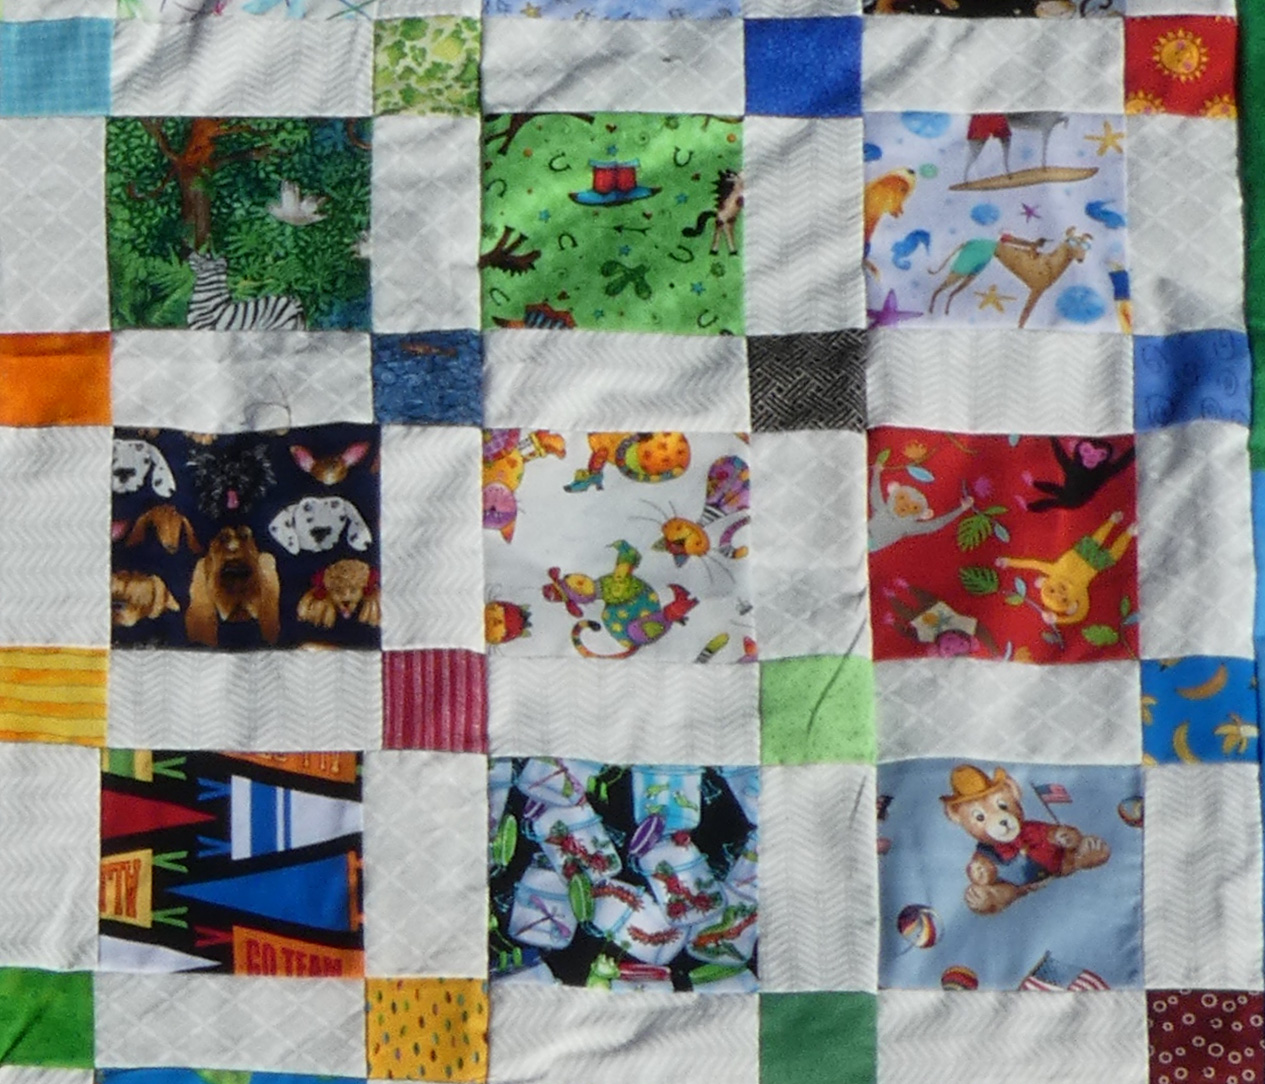
Here are some of the fun fabrics. Out of every 6 prints, 5 are from the donations and 1 came from my stash or a few new purchases.
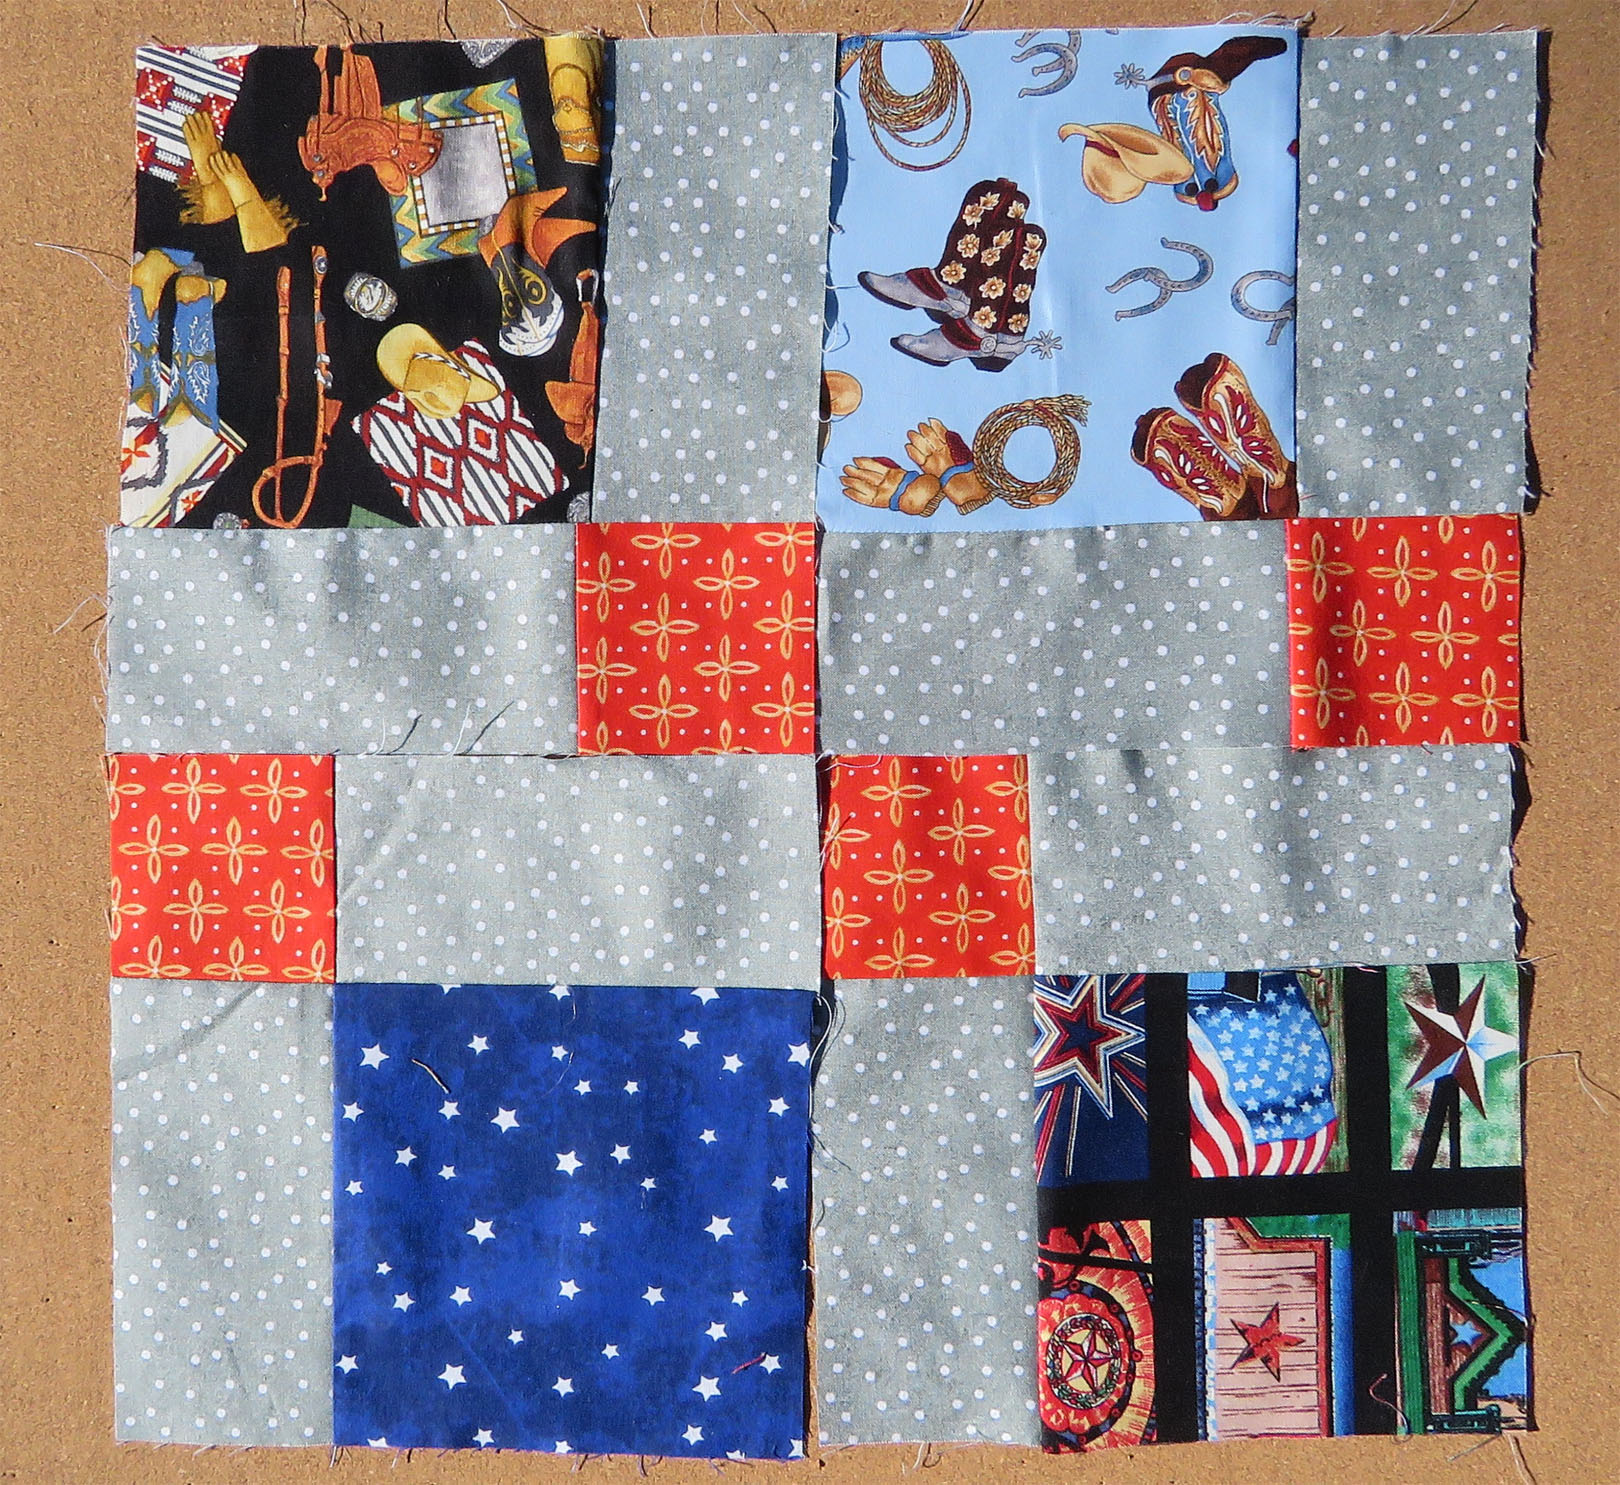
After staring at one of the quilts one day, it occurred to me that I could have made them with the disappearing nine-patch method! So I started another top to check that out.
Ordinary nine-patch blocks. Each fabric is a 6-inch square.

Step 1) Make your nine-patch block.

Step Two) Cut it apart in the center, vertically and horizontally.

Step Three) Turn the pieces for different effects and restitch. This arrangement gives a sash and cornerstone look, which is what I was going for in the kids’ I Spy quilts.
Also Step Three) Turning the pieces a different way results in rows of small squares.
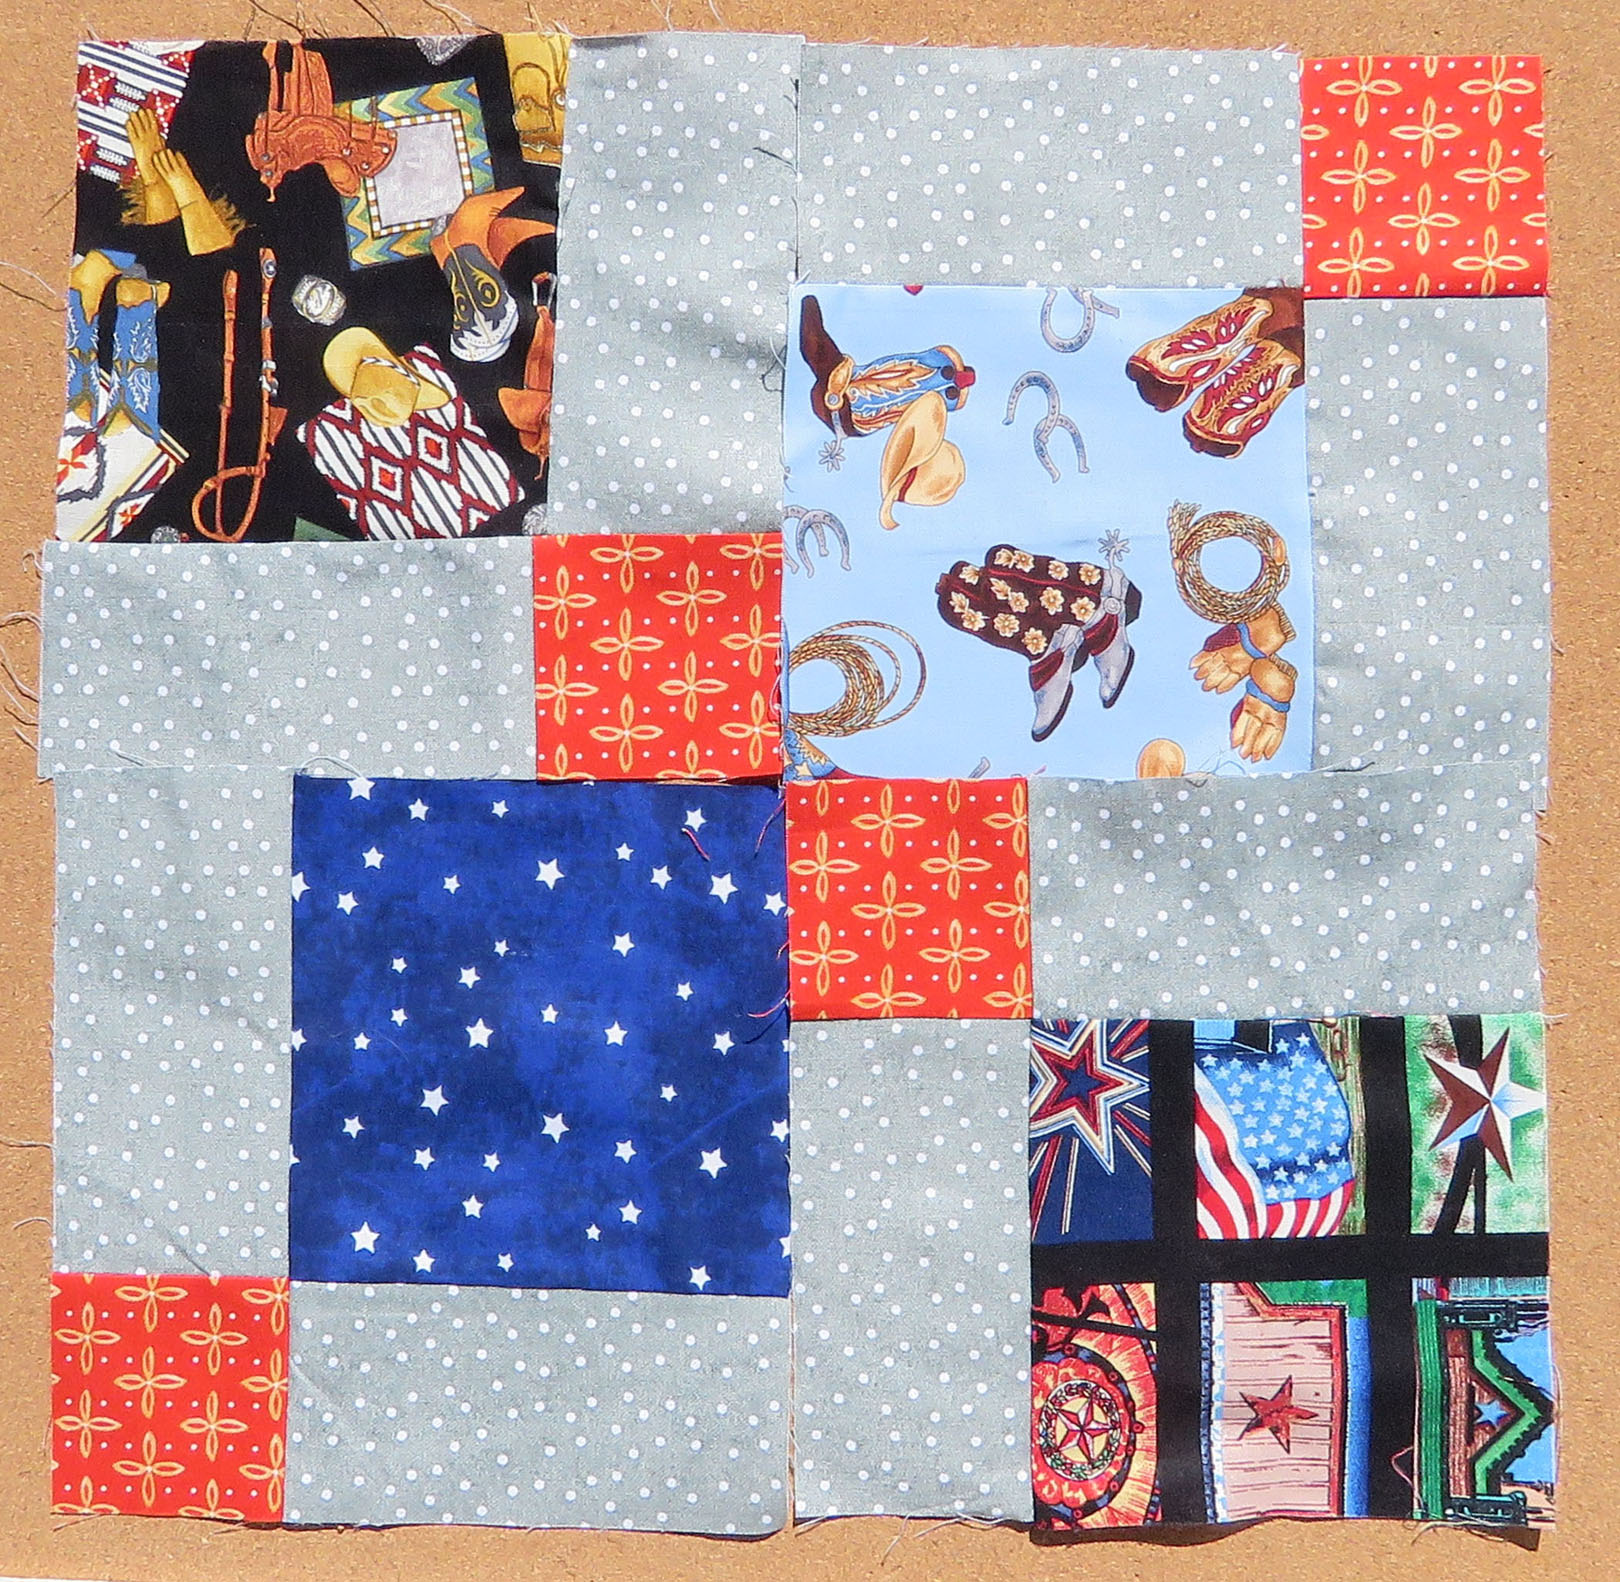
Yet again Step Three) This arrangement makes the large squares appear to float over the red squares.
Here is a diagram I have posted before to illustrate the concept. (For some reason, out of everything I have ever done, this is about the only thing pinned on Pinterest, and it is pinned way more than I think it deserves.)

This diagram shows how cutting up a 9 patch and rearranging, makes it look like you did lots of fancy piecing. It only shows one choice on turning the pieces but there are others.
I am still deciding on the final arrangements. Here are some possiblilities:
Here I took the cut quarters of the nine-patch and turned each small red square to the bottom right. This gave it the look of adding sashing and cornerstones to the larger squares, and I was seeing how I liked columns of the same sashing.
This one still has the sashing and cornerstones look, but with the gray sashing fabrics in the center.
This one has rows of small red squares together between the rows of large black and blue squares.
This one has the most movement, to my eyes.
I think I am going to go with the second option, the gray center with the sash-and-cornerstone look. I will be more precise with where I arrange the large blocks though, and move matching ones farther from each other.
I have heard that whether you create this design the traditional way, by cutting pieces of various sizes; or this way, by piecing nine-patches first and then recutting, the actual amount of cutting is the same. By my reckoning, for eight of the blocks (each having one large square, one small square, and two strips), it would take 19 cuts the traditional way, and only 12 the nine-patch way. And for the finished quilt, I will have to cut small pieces to balance the sashing all around, so maybe that will make it about the same. But for me, making nine-patches first certainly feels like a lot less fussing with picking up pieces, matching corners, etc.
One of these days I am going to have to quilt some of these!


I love all of these! I’ll have to try a disappearing nine-patch sometime.
I am glad you like them! 🙂
Disappearing 9Patch does seem quicker and easier… until you get to the part where you have to decide which way to place the blocks! My first choice for layouts is the same as yours. If I didn’t have an in-house long arm quilter I would be in the same boat you are in terms of tops vs finished quilts.
I envy you your quilter! I think if my fabric was in nice big pieces, I could happily just look at it stacked on a shelf and dream of future designs, but since I got so much of it already cut up, I just feel like I have to get all those little pieces combined into something. 🙂
I like your choice best myself as it appeals to my symmetrical soul, but the last version has a tiny bit of a Trip Around The World feeling which you could probably emphasise if you chose your colours carefully. So many options available with this technique! And although I don’t love themed fabrics usually, I do love that horse quilt top.
Yes, I don’t love themed fabrics either. But that is pretty much all I got in the bags of free fabrics, and at least these are better than a lot of the other choices, which included frogs wearing biker gear, three different peace symbol designs, and pastel bunnies in dresses from the 1980s. 🙂 I foresee a lot of textile paint in my future.
I suppose it might make an interesting pieced backing, and wouldn’t go to waste… I’d be bundling it up to pay the joy forward!
I cannot pass on those ugly fabrics to others, I feel the responsibility to salvage them somehow. 🙂
Even ugly fabrics can be useful and interesting in a scrappy quilt. It’s just having them in volume that would deter me!
ok, i am going for the horse one! i like the tones of it. those 9 patch pieces are so clever though.
I have been making the disappearing 9 patch for at least 5 years — I would feel much more clever if I had figured out I could apply it to more designs more quickly than I did! 🙂
Comforting to know I’m not the only one with unfinished tops! Those 9 patch pieces are pretty cool!
Thanks! I think using that method will help me build up a pile of unfinished tops more quickly! 🙂
I love the horse themed fabric quilt and it does look like tiles! That is so cool!
Thank you! I enjoyed working on it. 🙂
These are all marvelous! I must say the neutral horse one is my favorite! A quilt top is just as beautiful as a quilt, you just can’t use it yet. 🙂
Thank you! They are not nearly as intricate as your quilts, but I am glad to get the pieces into something useful. 🙂
or as friends do, use them for tablecloths!
If I did that, I would have to get a group of friends and relatives who eat more neatly. 🙂
Wow, great to get so many tops together!
Thanks! But to be honest, I started on them about a year ago! 🙂
Pingback: Some Quilts Finally Finished | Deep in the Heart of Textiles