March Materials Madness
It all started with the book, The Uncommon Quilter: Small Art Quilts Created with Paper, Plastic, Fiber, and Surface Design by Jeanne Williamson. It’s a big title, but the quilts in the book are small – Williamson was challenging herself to make create one experiment a week. She just wanted to try new things, without worrying about whether they were successful or not. Using all kinds of found and recycled objects, she played with color, composition, texture, and form.
I was really intrigued by her idea of just experimenting, and of using no-cost objects, and I have had it in the back of my mind for years. Here are some of the materials I decided to try. As I brought them out to play, I found that a few lost my interest quickly – they just seemed to require too much effort for mediocre results. But most were fun to play with, and I can see myself using them again in the future.
First, the real wash-outs. I had six spools of Solar Active Thread – it is white to start with, but is supposed to turn color in the sun. I thought it would be a variegated thread, but each spool is supposed to change to just one color, magenta, red, etc. I’m not sure what the good of this would be. If you know you want red thread, wouldn’t you just put red in the sewing machine? What is the advantage of white thread that turns red?
To make it worse, the thread broke continuously, and did not turn color at all in the sunlight. To be fair, I was given this thread, and there’s no telling how old it is, but still.
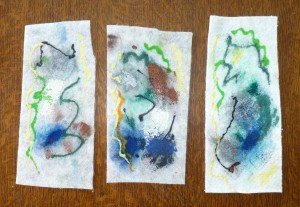
I tried making silk fusion paper earlier in the month, and that process left me cold. It involved a lot of textile medium and drying time, to get a dull result. My fiber will be spun, not fused, from now on.
Next I tried dyeing batting. I read about this in Quilting Arts back in 2007, and I thought it would be a great technique. I used 100 % cotton batting and Jacquard Dye-na-flow paints, as suggested in the article, but I don’t know why I thought I would like this. The batting is bound to soak up more dye than cloth would, and take more time to dry, and I am not a big fan of fuzzy surfaces anyway. The dyes looked intense when wet, but faded to almost nothing when they dried. I tried polyester batting too, but didn’t like the results any better. I’m sure someone can turn this technique into fine art, but not me.
Then I tried painting batting with acrylic paints. Again, the batting soaks up a lot of paint, takes forever to dry (like three days), and then feels like melted plastic afterward. I just don’t see what advantage there is to painting batting as opposed to painting cloth. I have retired this technique.
After that, I had more fun. I remembered that Williamson had used produce net bags (from lemons, potatoes, etc.) in her mini-quilts, and I started collecting them. It’s amazing how many variations of those are at the grocery store. Here are some of the other supplies I gathered up to use with them.
They were all things I had lying around the house, with the exception of the sari silk ribbon and yarn. I am always buying these at W C Mercantile in Navasota, Texas, planning to get really good at couching threads and embellishing quilts, but that hasn’t happened yet.
I used the plastic sheets that are meant to hold slides and photo negatives, to contain some of the packing material and netting. I also used some heavy black mesh shelf liner, which I liked for its graphic weight. It was fun to arrange the objects in the pockets, and they were easy to sew. (If you decide to try them, it is easier to sew them in place first, especially if you are going to put something bulky in one of the spaces.)
Once I started experimenting, I had a lot of fun playing with the transparent effects of the produce netting. It took on different appearances depending on how many thicknesses I used, whether I layered it with a different color, or whether I stretched it out. I even rolled it up. (If you decide to try using them, for small pieces, it is easier to sew the netting first, and then trim it to the size you want.) I used a scrap of an old sheet and some batting for the background.
Once I had the photo sheets the way I liked them, I removed them to add more netting on the background.
Then I sewed the binding on before adding the bulky sheets, because I thought that would be easier.
After the binding (which needs a lot of help, but that was not my focus with this project), I put on the pocket sheets as another layer.
For further layering, I tried wrapping the slide frames with pony tail holders, sari yarn and the sari ribbon. The only one that looked right to me as this piece progressed was the sari ribbon, mostly because of the color palette. But I think I will use sari yarn and pony tail holders in the future.

Slide frame wrapped with pony tail holders – I think this could be a cute edge treatment in the right place.
I love these little cosmetic sponges for applying paint, and they always seemed like a great possibility to use as batting shapes.
I wrapped in a large-scale flexible mesh and added them as another layer.
I had a lot of fun experimenting. However, after I was finished, the piece reminded me of those travel toiletries bags – too many plastic pockets! So I don’t plan to use those again either. But it’s just as important to know what you don’t want to do again – now I can pare down my supply closet a little with no guilt.
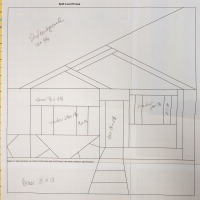
So that’s my March Madness. And since everybody’s thinking in brackets this time of year, here’s how these materials played out for me!









Great post, and hard work is rewarding. Have A Blessed Easter Weekend! Mtetar
You too! Hope all is going well with you.
Thanks all is well! Mtetar
Hard work also feels, and looks good. Mtetar
You are so right about finding out what you don’t like or want to try again. It is the greatest lesson of this project of yours. I enjoyed reading your process.
Thanks! I think it’s the best thing about having a blog – it makes you get out or get into the studio and get something done!
Pingback: Textile Ingredients | Deep in the Heart of Textiles