The Endeavourers’ Reveal Day, August 2021 — Opposite Day
Once a quarter I make an art quilt for an online group, The Endeavourers. This time the theme was “Opposites Attract.” I had a very hard time coming up with anything, but finally I remembered the fun of having “Opposite Day” when my kids were little — eating dinner for breakfast (starting with dessert), wearing pajamas during the day, saying “yes” for “no,” etc. etc.
So what, for me, would be the opposite of my normal quilting process?
| “Normal” | “Opposite” |
| printed quilting fabrics | my handwoven fabrics |
| batting on the inside of the quilt sandwich | batting on the outside of the quilt sandwich |
| applique | reverse applique |
| piece, quilt, paint and/or embellish | paint, quilt, piece |
| somewhat representational | simple geometric shapes |
| binding | decorative edge |
But let’s not go totally overboard! With every Endeavourers’ project, I attempt to try out at least one technique that is new to me, and use up materials I have had for a long time, so I stayed with those intentions.
Once I had the idea of “Opposite Day”, the project became fun for me.
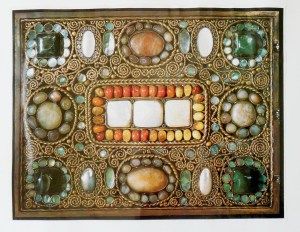
To come up with a nice composition for “simple geometric shapes,” I went through my visual reference notebooks, and chose this image. (I think it is a medieval book cover, but didn’t save any caption that was with it, and Google cannot find a similar image.)
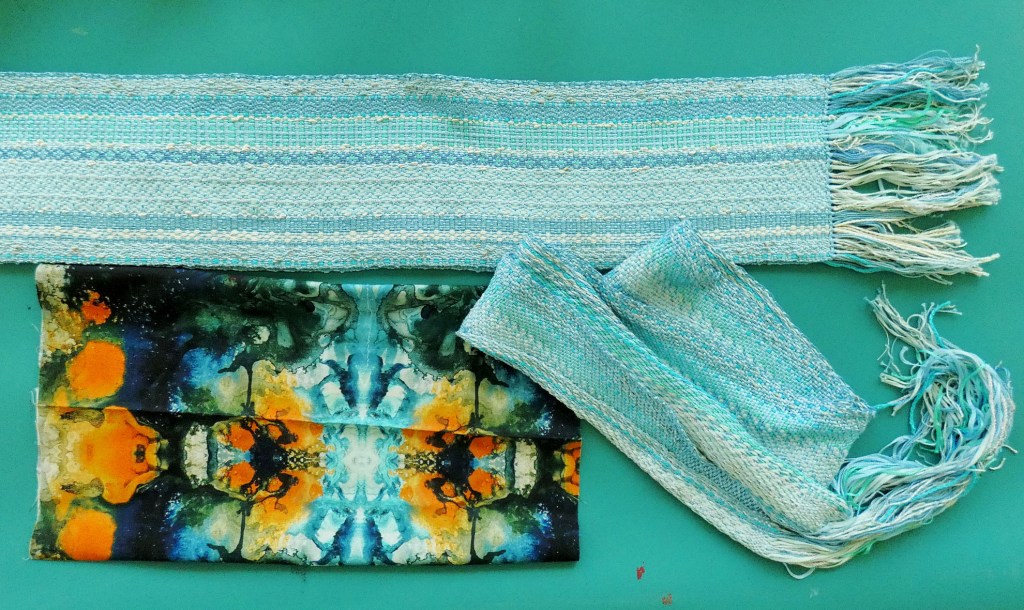
For materials, I chose these ribbon scarves — I had handwoven them, probably about 1990? But I never could wear them because the ribbons snagged on things. I also chose this fabric — I purchased it in 2017 in a bundle from SAQA artists — when I looked at the whole piece, the reflected colors made me see spiders and snarling dragon faces, so I wanted to cut it up.
I remembered seeing how Judy Coates Perez had experimented with using paint on batting, and I thought that technique would make an interesting top layer. I cut out the geometric shape areas first, and used Jacquard Dye-na-Flow as a base coat. (When the batting was wet, it did shift around a little as I brushed it, so I may have been better off to dye it all first, and then cut out the shapes.) Then I touched it up with a little Jacquard Lumiere textile paint. After it dried, I did some free-motion stitching.
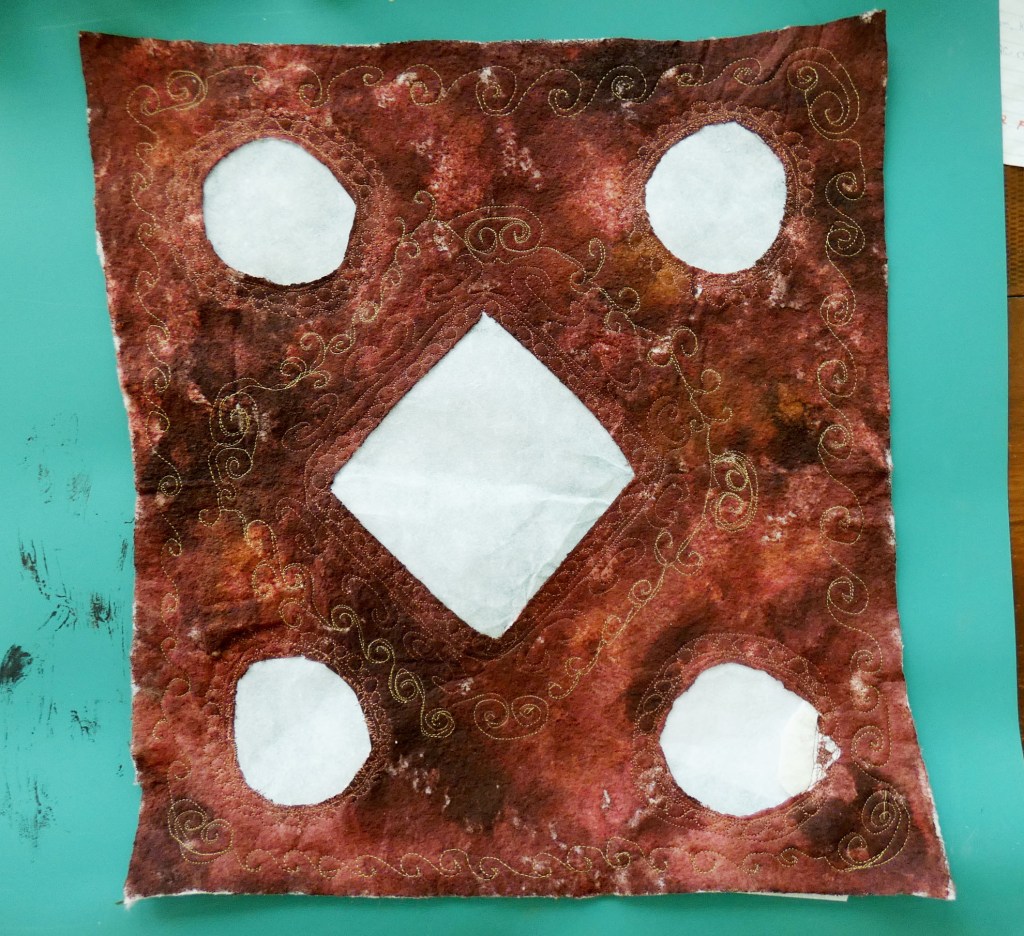
I gave the whole thing a couple of coats of matte medium; then I sandwiched it with the fabrics and a bottom layer of batting, and stitched around the fabrics to hold them in place.

At this point, I realized I should have done a whole lot more decorative stitching BEFORE I sandwiched it — because any further stitching would have to go through bulky handwoven fabric and a second layer of batting.
I did a little more stitching around the edges. My machine handled it well, but the thread did break from time to time, so I ended up using some metallic markers to draw lots of spirals on the painted surface. (These were Elementz markers that I had had for at least 5 years and never used, and they worked great!)
Then I used more Lumiere paints to make the dots representing the tiny stones, plied some rayon ribbon and sewed it around the edge.
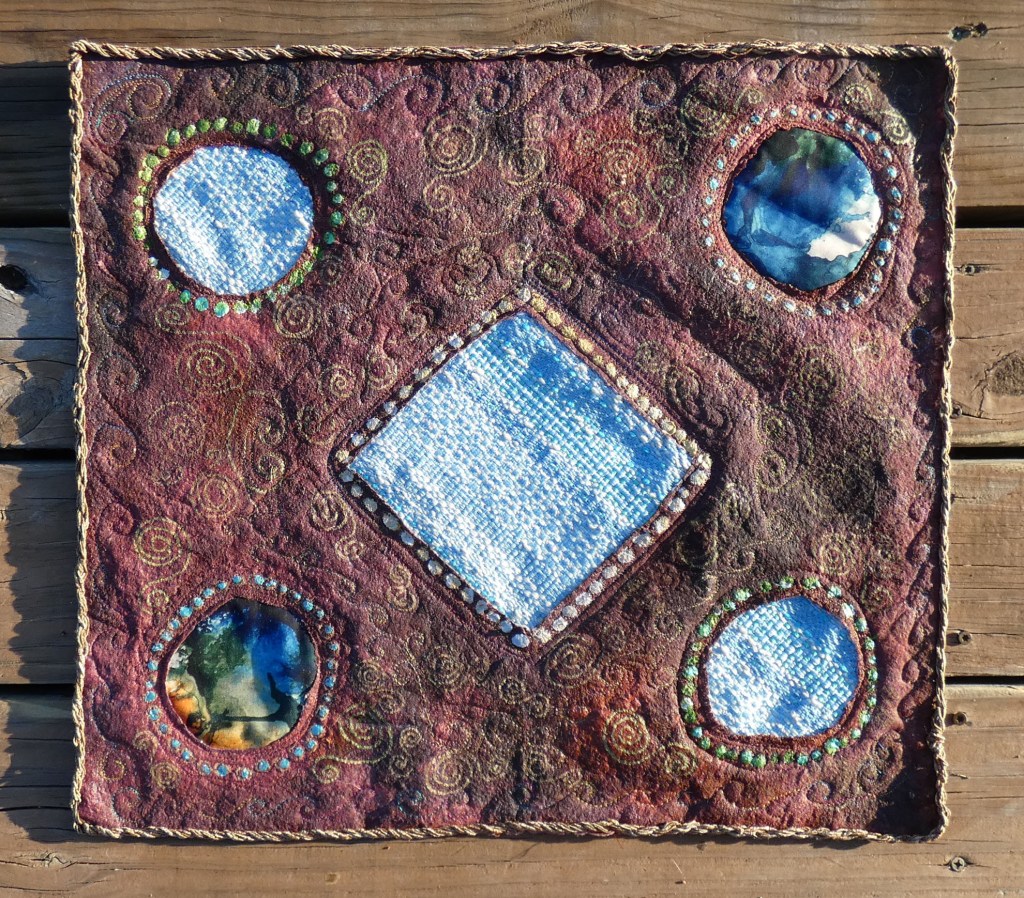
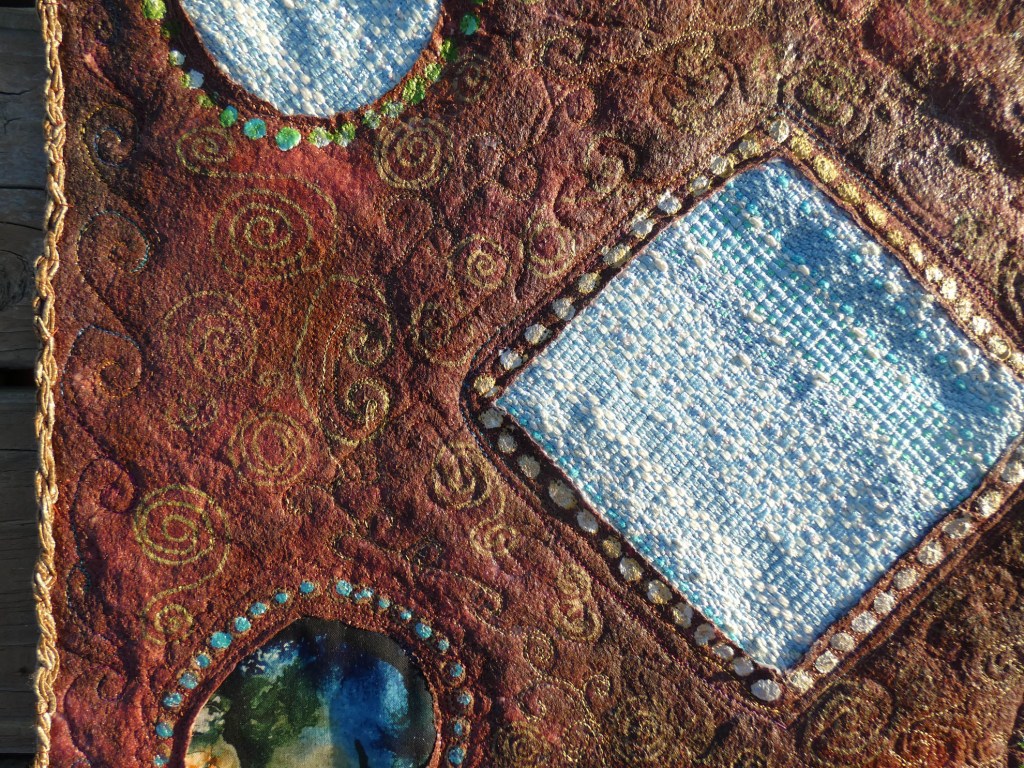
Detail of the dyed, painted, stitched surface.
As usual, this is not a piece I would put in a show; it’s a piece for stretching my thinking and for trying out techniques to see if I like them. I had a lot of fun working on it!
You can see how everyone else interpreted this theme at The Endeavourers’ blog!


I love the texture and spirals of the background, it makes me think of Aboriginal rock art.
Wow, thank you, that is really a compliment! I love Aboriginal art!
What an intriguing choice for inspiration, and I applaud your resistance to using beads in your interpretation. Think of all you learned on this piece. Love your opposites list.
Haha! I have to admit I am a sucker for beads. This piece is big enough that beads would really have been lost on it thought, and two other things stopped me — the thickness of the painted batting and the fact that time was running short. 🙂
Your interpretation of the medieval book cover is AMAZING!
Your creations always amaze me!
Pingback: Repost — The Endeavourers’ Reveal Day, August 2021 — Opposite Day — Deep in the Heart of Textiles – Humoring the Goddess
Love your creativity! Am reposting today. Keep going!!
Thank you so much, Claudia!
Very creative. I am happy to see a fiber artist using batting in an unexpected way. Maybe I will try painting on it. Thanks!
Judy Coates Perez is the artist from whom I got the idea — her work is amazing! Thanks for stopping by!
Certainly was Opposites! I like the look of the paint on the batting. The fabric circles look like water. Quite a stretch I’d say and you did it with class!
Thank you so much! It was a fun experiment.
I love your phrase, “At this point, I realized…” Sounds like a typical project to me!
Yes, I am pretty sure that for one of these Endeavourers projects I wrote — “Plan A becomes Plan B through D, and then the whole thing goes out the window and I start over,” but I can’t find that quote now. It is a great summary of my process. 🙂
This was such a clever and fun interpretation of the theme. I enjoyed seeing more detail about how you made it. I also love the idea of opposite day. I must remember to do it with my little granddaughter (who has just had her first birthday) when she gets a bit older 🙂
You nailed it! A beautiful work of art!
Thank you, I had fun with the concept. 🙂
Beautifully made! Thanks for showing the details.
Thank you so much!
Pingback: Notes on Design Styles | Deep in the Heart of Textiles