13 Ways of Looking at a Wren
Carolina Wrens have dumpy little bodies that are constantly in motion. Their characteristic bobbing movement reminds me of those cheap toys that have springy legs and suction cup feet – you push the toy all the way down, and when the suction cups let go, the legs spring up to full length. That’s how the wrens move – turn sharply left, turn center and sink all the way down, spring up sharply to the right – over and over.
With strong white “eyebrow” stripes and a long, down-curving beak, they look like they are permanently sneering. They remind me of feisty tiny old men. If they had hands they would hold miniature walking sticks to shake at unwelcome intruders.
They are absolutely undiscriminating as to where they build their nests, and I am always finding nests in old cardboard boxes of nails, or in old river shoes that have been left out in the barn.
Best of all, they say “cheeseburgie cheeseburgie cheeseburgie” just like John Belushi on those old SNL skits. (Listen to the second recording here, and you will see that I am right.)
Normally my photos capture the wrens in profile,

Carolina Wren in profile.
but about a month ago I got a picture straight on, that made me wonder how a wren sees around that beak! I loved this composition of graceful lines of branches and vines arching protectively over the pear-shaped wren, and decided to use the image for some art quilt technique practice.

I loved the blurred patches of color in the background, too. (I increased the saturation.)
To reduce my photos down to their important lines, I have been using Photoshop to convert the picture to black and white, and then using the “Find Edges” filter, and that gives an effect like this:

The wren photo after going through the Stylize/Find Edges filter in Adobe Photoshop.
But in her book Dreaming From The Journal Page, Melanie Testa suggests using just regular tracing paper to capture the lines you like in a picture, and then using that as a layer of an art journal page. I tried it, and really preferred it — the lines looked more alive to me. I used one traced drawing over a background of Golden acrylic paints, and one by itself, with some Inktense colored pencil details drawn on top.
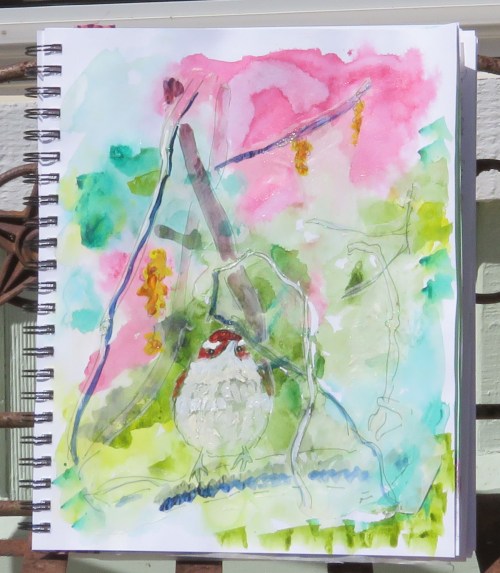
The tracing paper drawing is glued over acrylic paints, and any extra tracing paper is cut or torn away .
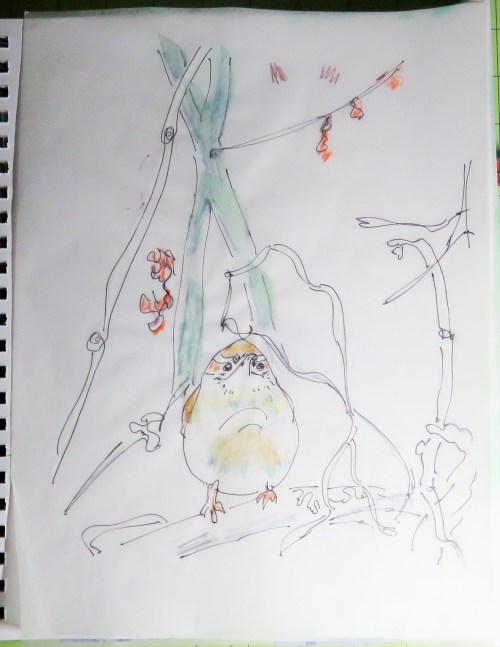
A simple tracing with some colored pencil details.
Then it was time to translate this into fabric. I wanted to see how vintage linens would work. I folded an old raveled and stained linen damask napkin in half, put some batting in between the layers, and thread-sketched the image.
I had seen an article somewhere years ago, about printing an image on organza, and then mounting it with its original photograph to give a misty, hazy effect. I couldn’t find the article anywhere so I did a little trial and error. I printed the picture on a piece of silk organza, and it was much more transparent than I expected. You could barely see it! I was very disappointed.
And yet, when I laid it over the sketches, I saw that, even though it didn’t call attention to itself, it did add some depth and a hint of realism.

The thread sketch.

The organza print is very faint. At this point, I was thinking, “Is this worth $2 a sheet?”

The painted sketch without the organza layer…

…and with the organza. It’s blurry because I didn’t worry about registering it precisely, but it looks more 3-D to me.
Setting aside the organza for a while, I went on to try different media on the vintage linen, which was lovely to work on! I used Jacquard Lumiere textile paints on one side —
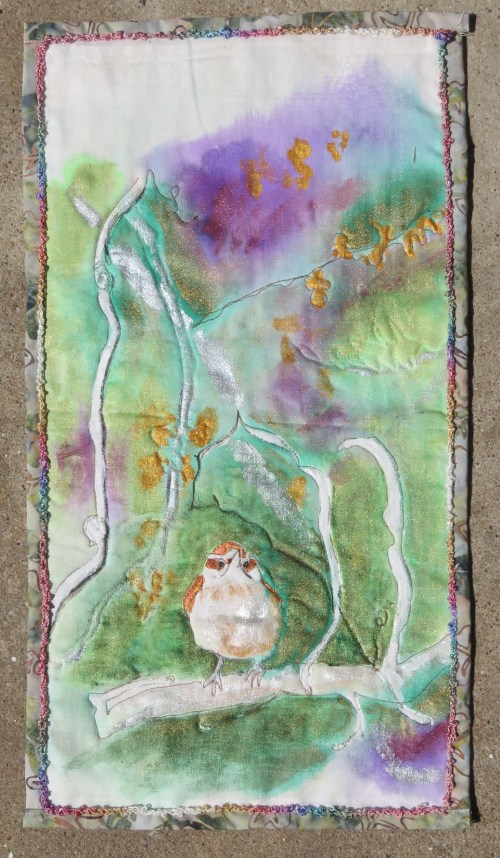
Wren quiltlet with Lumiere paints.
— and Inktense pencils and textile medium on the other. I preferred the more muted colors of the Lumiere paints. But the pure hues of the Inktense pencils could look good on a project for kids.

Wren quiltlet with Inktense pencils. Not my favorite piece, but it’s only practice.
I still wanted to find a good way to use the sheer image, so I searched online “printed organza with photos.” One of the top results was a Quilting Arts video that I already had, but had never watched! (Season 2, Episode 209, and the segment is downloadable here.)
I immediately watched it, and learned so much from artist Wen Redmond. Due to the supplies I had at home, I ended up doing things a little differently than she does. She dyes, prints, or paints special fabric to match her focus image, and then transfers the image onto that. She sews the silk organza to fabric and mounts those on the front of artists’ stretcher bars, and then mounts the background image below. The two printed images are then 3/4 of an inch apart, which she says is the perfect distance for them to register correctly, and still be readable as two separate images.
I used a regular artists’ canvas that I had on hand, flipped upside down. Inside, on what would normally be the back of the canvas, I painted some green textile paint. I printed the wren photo on a piece of printer silk, and attached it with basting spray. I glued some batting scraps to the wooden bars of the canvas to pad them a little. Then I sewed various scraps of fabric around the organza print, and wrapped them around the edges of the canvas.

The same image is used twice – a regular print inside the shallow box, and a sheer print suspended above. If I decide I like it, I will probably add something more to the plain white sections.

This photo is taken from the side, to show how the two layers appear at different angles.
The final effect is a little like those changeable pictures that came as Cracker Jack prizes. I did not get the amazing results I hoped for, but I can think of a lot of variables I can tweak to get better results. And I’m glad I finally got to this technique that has been on my “To Try” list for a long time.


You are so talented. I enjoyed seeing the whole process and seeing the ending results. Beautiful.
Thanks! It is fun to experiment and see how it turns out!
My goodness, you know how to have fun! It’s fascinating to watch as you indulge your curiosity!
It has been very freeing to tell myself “This is not FOR anything but practice!” 🙂
Fascinating!!!!!!!!
You have quite the series going on. What a good idea to use the back side of a stretched canvas as a shadow box.
And now that I read your post on the translucent fabrics, I have even more ideas! I am looking forward to seeing what you do with the ideas you got in that workshop.
That is quite the ride! I enjoyed it very much 🙂 Thanks.
Thanks! It is so much fun to experiment with technique and materials!
What a lot of ideas on just one subject. All are interesting and I love that cute little subject!
Thank you. I think wrens have such personality!
This is SO COOL!
Thank you! Glad you liked it!
Thanks for sharing that neat project…I do love taking bird pictures too. May I ask the type of camera you use and the lens?? Thanks
I just got a Canon Powershot SX60. It has a 65 times zoom! My old camera (that I loved) was a Panasonic Lumix with 18x zoom, but I had had it for years and it was starting to die, and a friend had a Powershot so I went with that.
The things I love about it compared to my old camera, are that it takes pictures so much more rapidly, and it will take shots continuously as long as you hold the button down. Also, the viewfinder screen flips outward, and can be adjusted to any angle, so you can actually see what you’re shooting. With the Lumix, I just had to point and hope.
But I am still learning which settings will give me the effects I want with the new camera. I can’t get it to focus where I want as well as I could with my old one, but I am sure that’s just me doing something wrong. But I can take pictures from so far away, the birds don’t even realize it and they stay put much longer!
Thanks for the info. I have a Nikon DSLR D50 that’s a few years old but it takes really great pictures! Recently purchased a new 18-250mm telephoto lens to see if I could get some close up shots of the birds. Not sure I like it as still experimenting with it. Had thought of purchasing a new camera but decided to try the new lens. So time will tell…
Pingback: 15 in ’15 Second Quarter Check-in | Deep in the Heart of Textiles
Pingback: A Tiny Touch of Nature — the Endeavourers’ Reveal Day | Deep in the Heart of Textiles